23 Creative DIY Fall Decorations You’ll Love Making
A glue gun, a free afternoon and a handful of simple supplies are all you need for diy fall decorations that look far more expensive than they are. Every project in this list is something you build with your own hands: wreaths woven from burlap, pumpkins folded from book pages, luminaries punched from tin cans and centerpieces stacked in an urn. Most materials come from the kitchen drawer, the yard or one quick craft store trip, and each project finishes in an afternoon or less. Pick the one that matches your table, your door or your mantel, and start there. By dinner, one corner of your home will already feel like fall.
Burlap Bubble Wreath

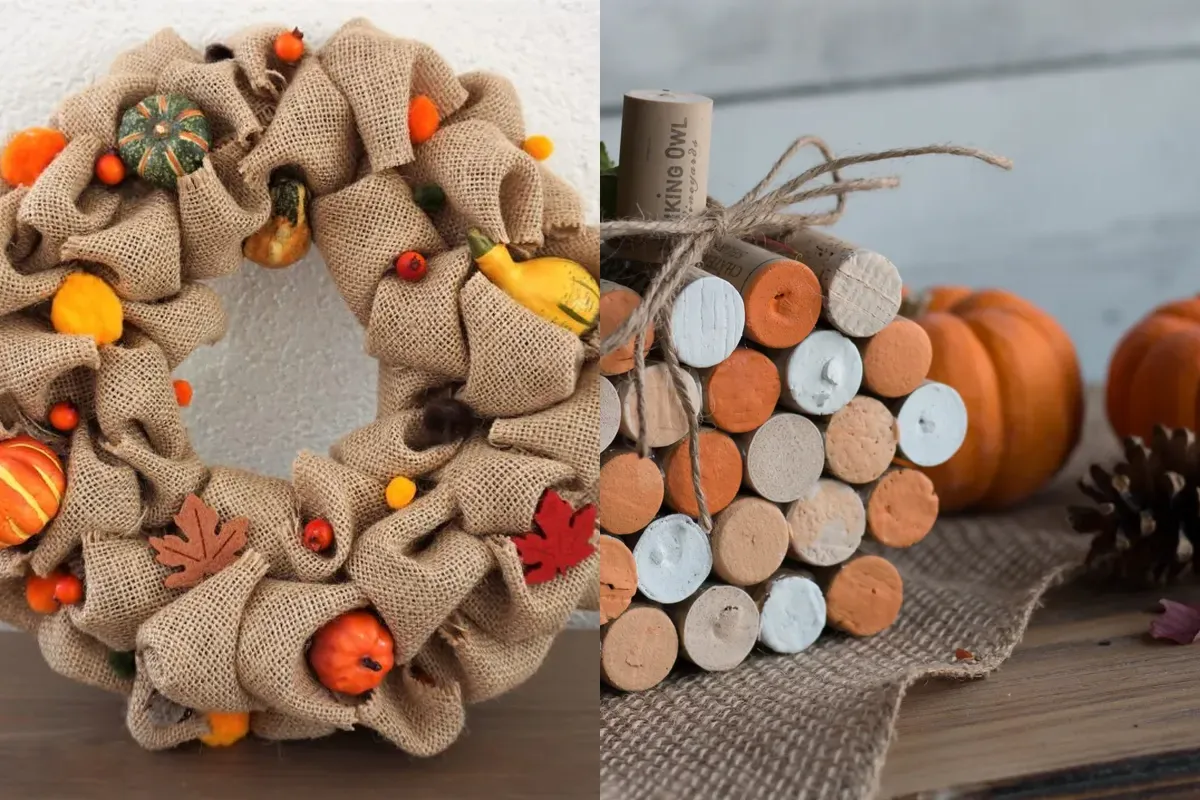
Ten yards of burlap ribbon and one wire wreath frame turn into the fullest wreath on the block. Push small loops of ribbon through the frame rings, one row at a time, and scrunch each loop tight against the last so no wire peeks through. The bubbles build fast, and the whole base comes together in about half an hour.
Wire in a few mini pumpkins, faux leaves and a plaid bow at the bottom, and the plain burlap suddenly reads as finished fall decor. I’ve made this wreath in three sizes now, and the smallest one still gets the most compliments. Hang it on the front door or over the mantel.
Wood Block Pumpkins
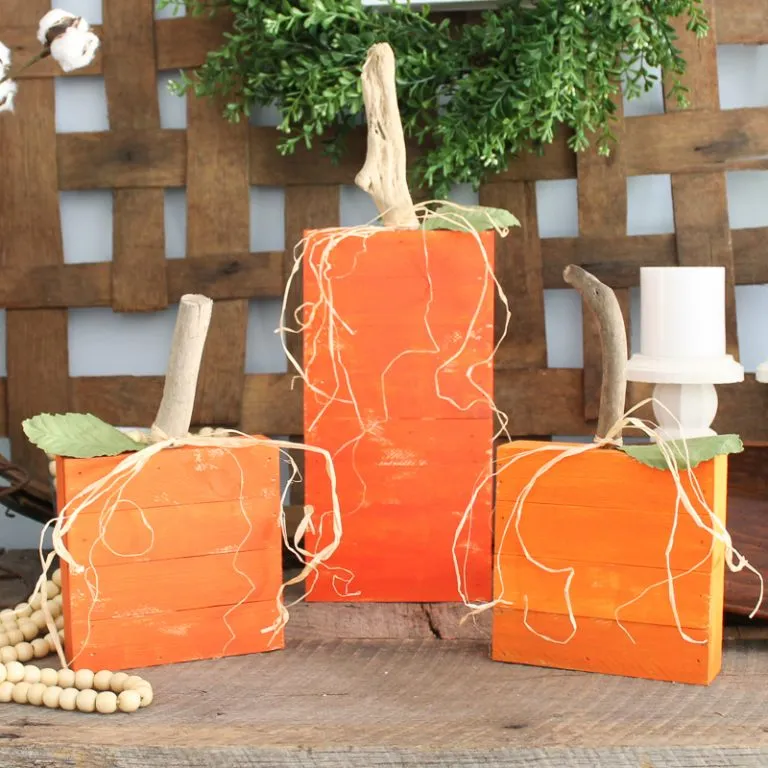
- Cut a 4×4 post into uneven lengths, or ask the hardware store to cut scrap blocks for you.
- Sand the edges smooth, then paint each block orange, cream or sage with a nearly dry brush.
- Glue a short stick, a wine cork or a cinnamon stick on top as the stem.
- Wrap a loop of twine or raffia under the stem for a soft, rustic finish.
- Group three blocks at different heights on the porch, mantel or entry steps.
Blocks beat real pumpkins on one point: they never soften, leak or draw fruit flies, so the same set returns every September. Line the bottoms with felt pads and they are safe on painted shelves and table tops too.
Pumpkin Vase Centerpiece
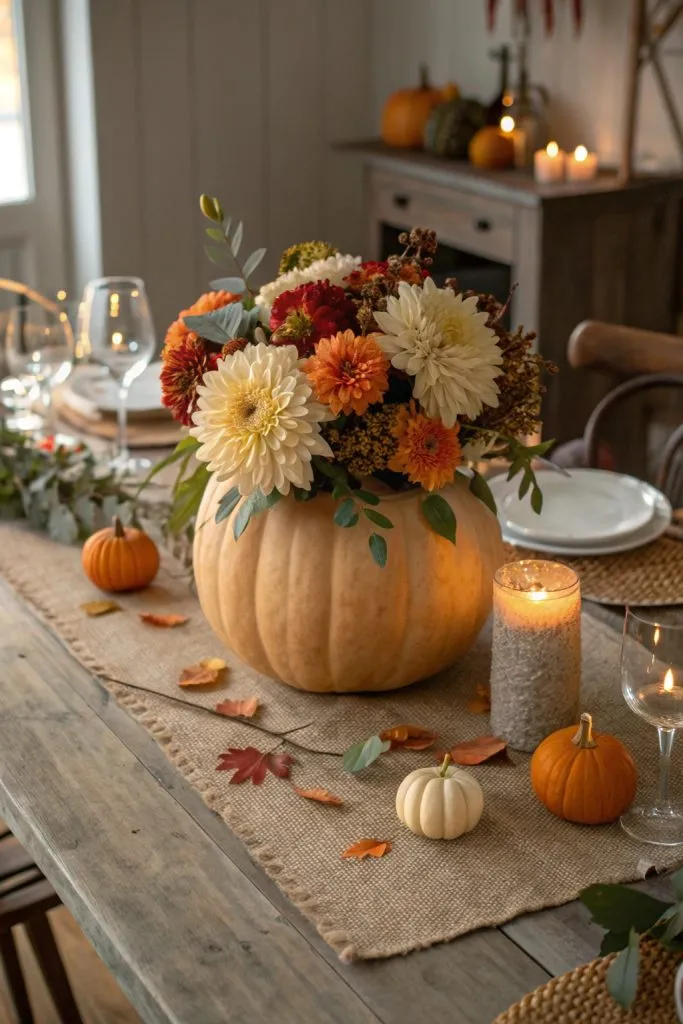
Quick Tip: Choose a wide, squat pumpkin and cut the opening slightly smaller than your jar. The snug fit hides the jar rim and keeps the flowers standing tall instead of flopping sideways.
Set a water filled jar inside the hollowed pumpkin, then arrange mums, dahlias, eucalyptus and a few dried grasses so the stems fan out at different heights. The pumpkin becomes the vase, and the whole table gains a centerpiece that looks arranged by a florist. Refresh the water every two days and it easily lasts through a holiday weekend.
Toilet Paper Pumpkins
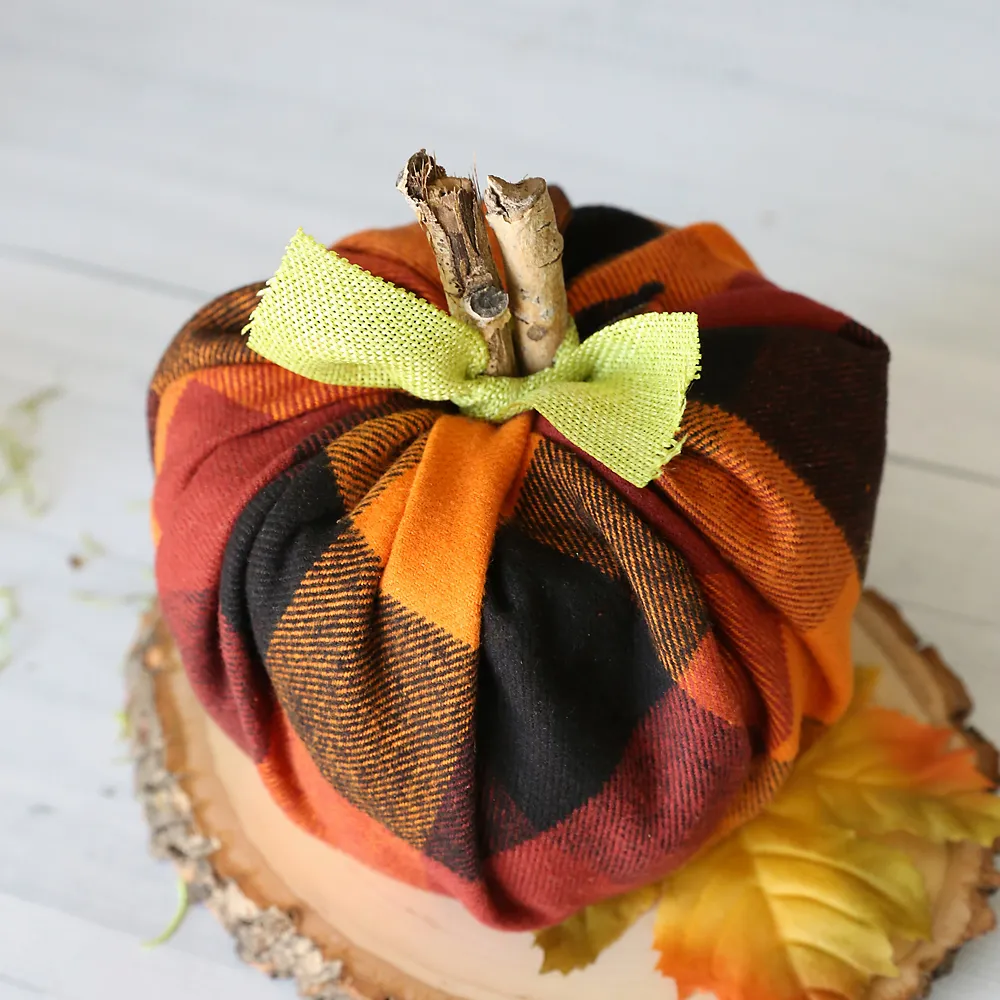
Before: The hall cupboard holds plain rolls of toilet paper that nobody would call decor. Next to them sits a leftover half yard of plaid flannel from a sewing project.
After: Twenty minutes later, three plump plaid pumpkins stand on the entry table, each topped with a cinnamon stick stem and a small green felt leaf. Guests keep picking one up, surprised by how light it is.
Wrap the fabric around the roll, tuck the ends into the center hole, and push the stem through the middle. No sewing, no glue, and the roll goes back to the cupboard in January, completely unharmed.
Pallet Wood Fall Sign
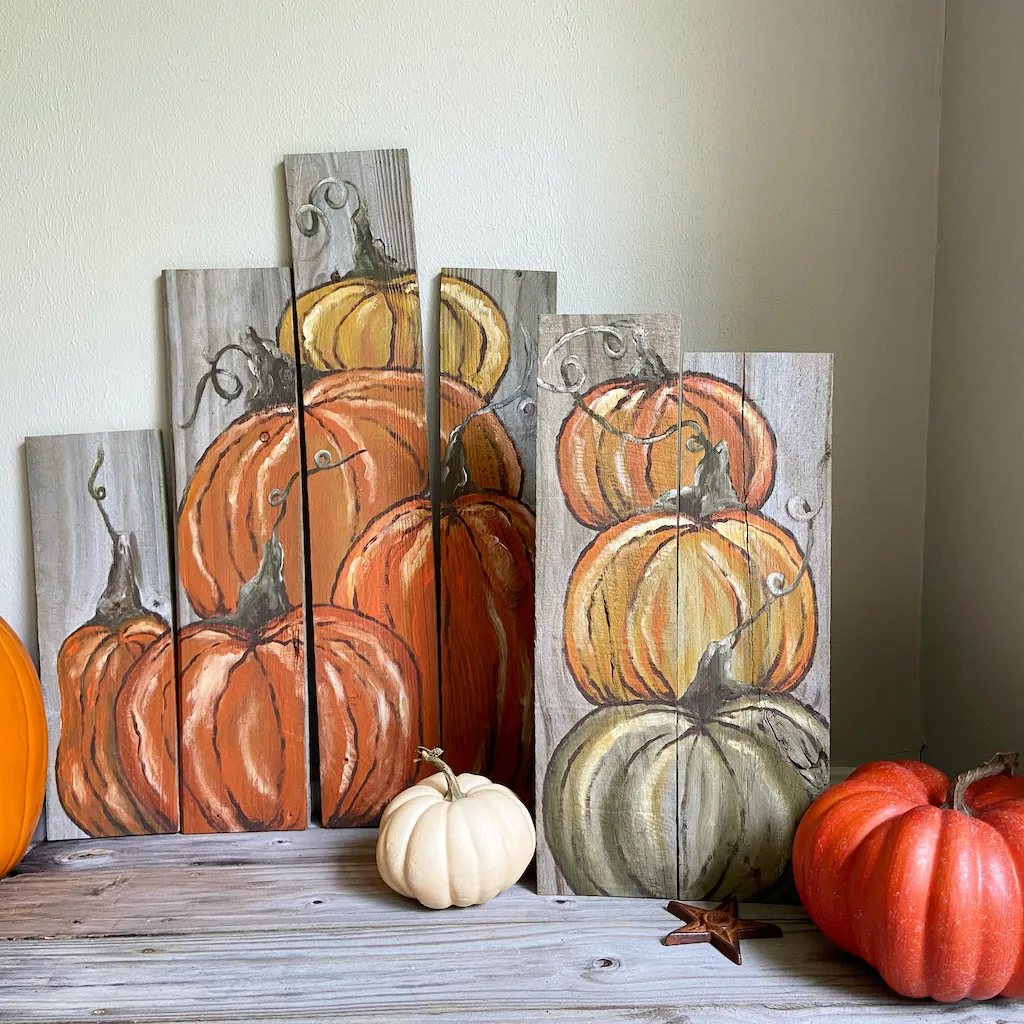
- Pull apart a pallet or line up three fence boards, then sand away splinters and rough edges.
- Whitewash the boards with watered down white paint so the wood grain still shows through.
- Sketch a pumpkin stack or stencil a word like harvest in pencil before painting anything.
- Fill in the design with acrylic paint, keeping brush strokes loose for a hand painted feel.
- Seal with a clear matte coat if the sign will live on a covered porch.
Lean the finished sign beside the front door with a lantern and a real pumpkin, and the whole entry looks planned. Pallet wood costs nothing, so a mistake is never expensive, just another practice board.
More Info : 22 Charming Fall Chalkboard Ideas to Welcome Autumn
Punched Tin Can Luminaries

Do:
- Do freeze water inside the can first, so the metal stays firm while you punch.
- Do draw your leaf or pumpkin pattern on paper and tape it to the can as a guide.
- Do punch holes about half an inch apart with a hammer and a sharp nail.
- Do paint the finished can copper, black or cream for a cleaner look.
Don’t:
- Don’t punch a drained, empty can; it dents and folds under the hammer.
- Don’t place real candles where leaves or curtains hang close by.
- Don’t skip the sanding step if the rim feels sharp after cutting.
Once the paint dries, drop in a battery tea light and line three cans along the porch steps. The pattern glows through the holes after dark, and each can costs nothing but a soup dinner.
Folded Book Page Pumpkin

Cost: Almost nothing, one damaged paperback book
Time: About 45 minutes, mostly folding
Skill Level: Beginner, folding only, no cutting tools needed
Best For: Coffee tables, bookshelves and reading corners
Tear the cover off a worn paperback, then fold each page toward the spine in the same simple pattern until the book fans into a round pumpkin shape. A stick pushed into the center becomes the stem, and a little orange paint along the page edges warms the color. Book lovers forgive this project because only damaged books qualify.
Terra Cotta Pot Pumpkins
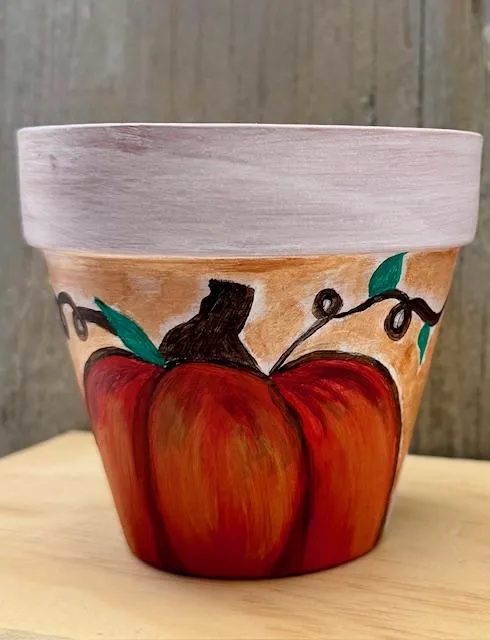
One plain terra cotta pot and three paint colors become a pumpkin you can keep forever. Wash and dry the pot, paint the whole surface a warm orange, then add darker ribs with a thin brush so the round shape reads clearly. A green rim or a painted vine at the top finishes the stem end.
Seal the paint with a clear outdoor coat and the pot works on the porch all season. Fill it with a mum, use it as a candy dish at the door, or line three sizes down the steps. The paint hides the clay, but the weight keeps it steady in wind.
Mason Jar Lid Pumpkin

- Gather about 25 canning jar rings, all the same size, and check they are clean and rust free.
- Thread the rings onto a piece of twine or wire, with every ring facing the same direction.
- Pull the ends tight and tie them off so the rings fan into a round pumpkin shape.
- Push two or three cinnamon sticks into the center as the stem.
- Tuck a burlap leaf or a curl of raffia beside the stem.
The whole project uses supplies most canners already own, and it comes apart in January if you want the rings back. Set it on a kitchen counter or windowsill where the metal catches the light.
Foam Pumpkin Topiary

Quick Tip: Run a wooden dowel or garden stake through all three pumpkins before you set them in the pot. The hidden spine keeps the stack straight when the porch wind picks up.
Start with a heavy urn or a clay pot filled with floral foam, then stack three foam pumpkins in shrinking sizes, large at the bottom and small on top. Tuck faux leaves, berries or moss between the layers to hide the joins. The finished topiary frames a front door beautifully and stores in a closet without shedding a single leaf.
Painted Wood Slice Pumpkins
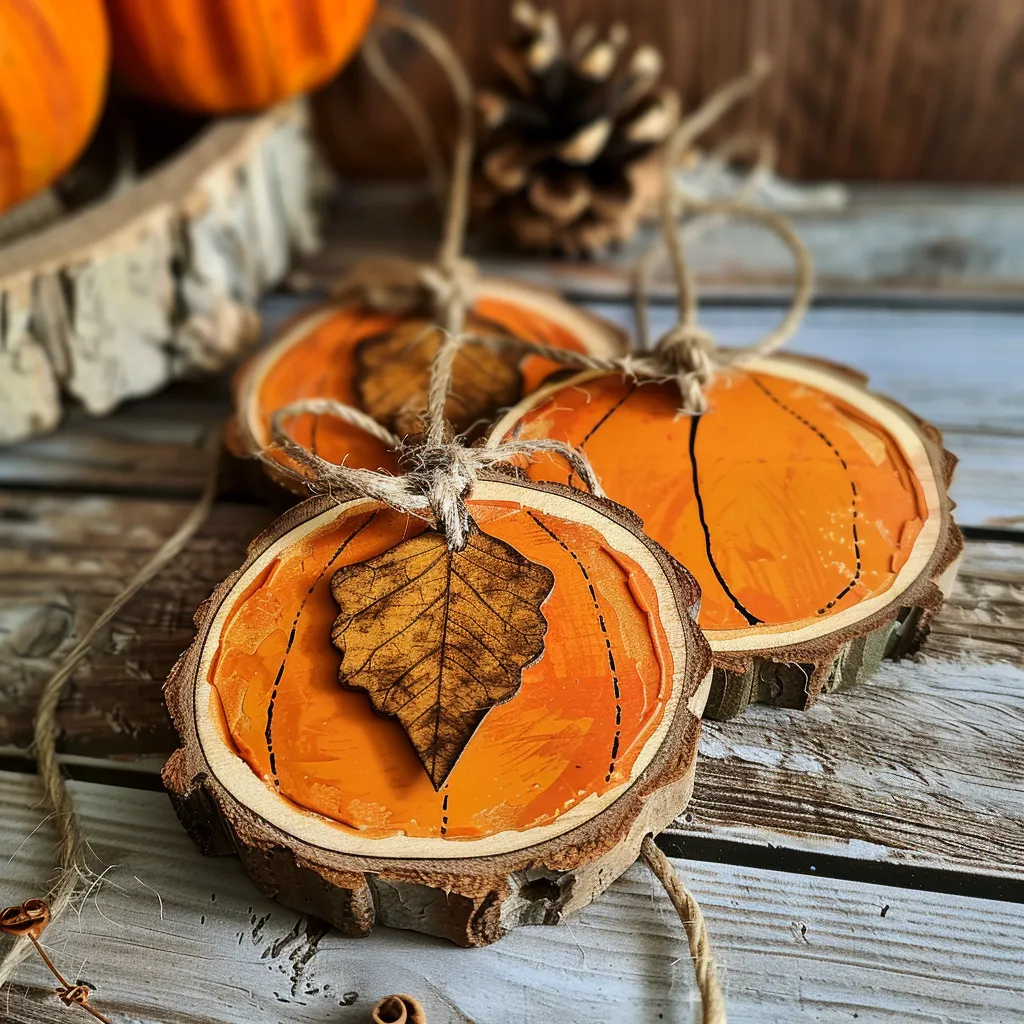
Before: A fallen branch in the yard is headed for the fire pit, and the craft shelf holds leftover orange paint from another project. Nothing about the pile looks like fall decor yet.
After: Sawn into half inch rounds and painted, the slices become flat little pumpkins with real bark edges. A real leaf glued at the top and a twine bow turn each one into an ornament or a place card.
Sand each slice smooth so the paint sits evenly, and drill a small hole if you plan to hang them. A row of these along the mantel or strung on twine makes a garland that costs almost nothing.
Wine Cork Pumpkin
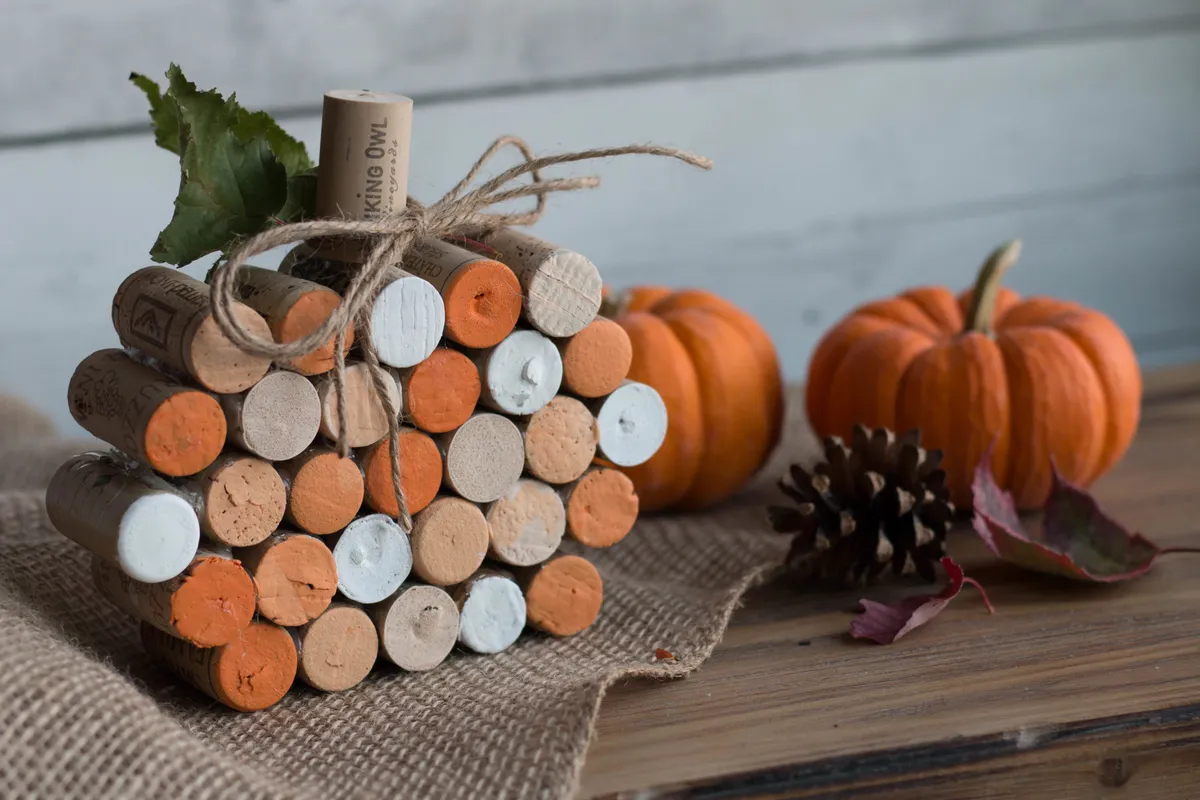
- Save about 25 wine corks, or buy a craft bag of them, all roughly the same length.
- Glue the corks in rows: four, five, five, five, four and three, letting each row dry.
- Paint the rounded front orange, leaving the ends natural or tinting a few green.
- Glue one cork upright on top as the stem and add a paper or felt leaf.
This little pumpkin suits a kitchen shelf, a bar cart or a wine lover’s gift table better than anywhere else. It weighs almost nothing, so it also hangs happily on a wreath as the centerpiece.
More Content : 24 Gorgeous Fall Garland Ideas for a Cozy Autumn Home
Embroidery Hoop Leaf Art
Do:
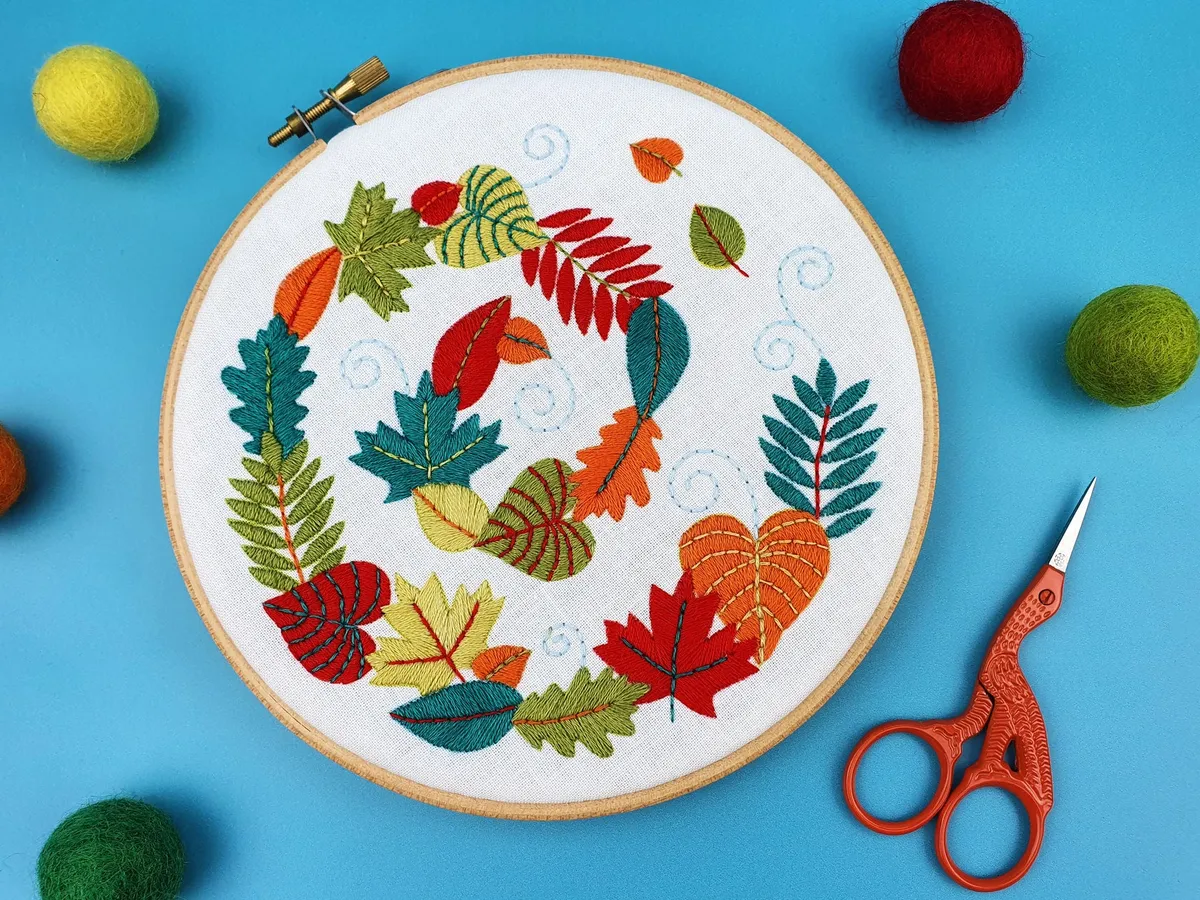
- Do stretch plain linen or canvas in the hoop and tighten the screw until the fabric drums.
- Do stitch simple leaf outlines in rust, gold and olive thread, or applique felt leaves with fabric glue.
- Do mix leaf shapes: one oak, one maple and a few long willow style leaves fill the circle well.
- Do trim the extra fabric at the back or fold and glue it down neatly.
Don’t:
- Don’t pull stitches too tight; the fabric puckers and the hoop warps.
- Don’t crowd every inch; empty space makes the leaves stand out.
- Don’t hang it in a steamy bathroom where the fabric can spot.
A set of three hoops in different sizes makes a gallery wall that feels handmade and calm at once. Change the leaves for stitched snowflakes in December and the hoops never come down.
Wooden Bead Garland
Cost: Low, one bag of wooden beads and jute twine
Time: About 30 minutes of stringing
Skill Level: Beginner, no tools beyond scissors
Best For: Mantels, shelves and tiered trays
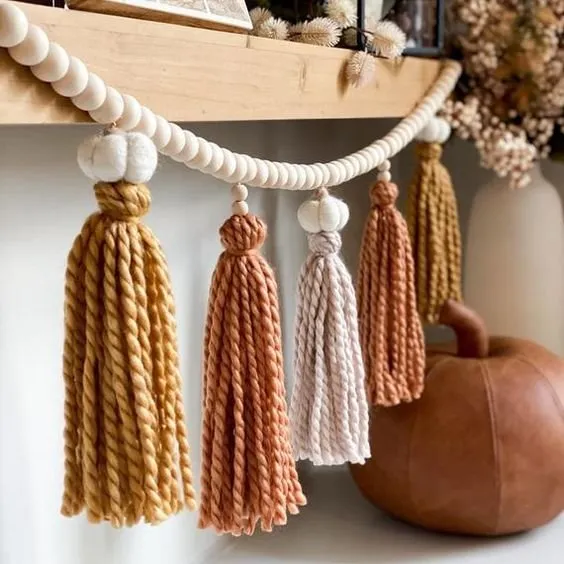
String natural wooden beads along jute twine, then tie yarn tassels in mustard, rust and cream at each end and slide a mini felt pumpkin or two between the beads. The garland softens hard mantel edges and layers well over a leaf garland. Leave the beads unpainted for a calm look, or paint every fifth bead in fall colors.
Twig Star Wall Hanging

Five straight twigs of equal length become a star with nothing but twine and a few tight knots. Lay the star shape out on the table first, lash each crossing point with figure eight wraps, and the frame holds firm. Willow, birch and garden prunings all bend without snapping when they are fresh.
Hang three stars at different heights on one wall, or wire a single large one to the front door as a wreath alternative. A tiny battery light strand woven through the points makes the shape glow after supper. Rustic pieces like this balance the soft pumpkins everywhere else.
Dried Flower Pumpkin

- Pick a smooth white or cream faux pumpkin with a flat, clean surface.
- Brush a thin layer of craft glue over one small area at a time.
- Press dried flowers, petals and small leaves flat against the glue in a loose pattern.
- Seal the finished pumpkin with a clear matte spray so the petals stay put.
- Cluster a few real mini pumpkins and candles around it for contrast.
Dried blooms give a plain pumpkin a garden party feel that suits a dining table or a bedroom dresser. Work slowly around the stem first, where mistakes hide easily, and the rest of the surface feels less risky.
Pressed Leaf Glass Frames
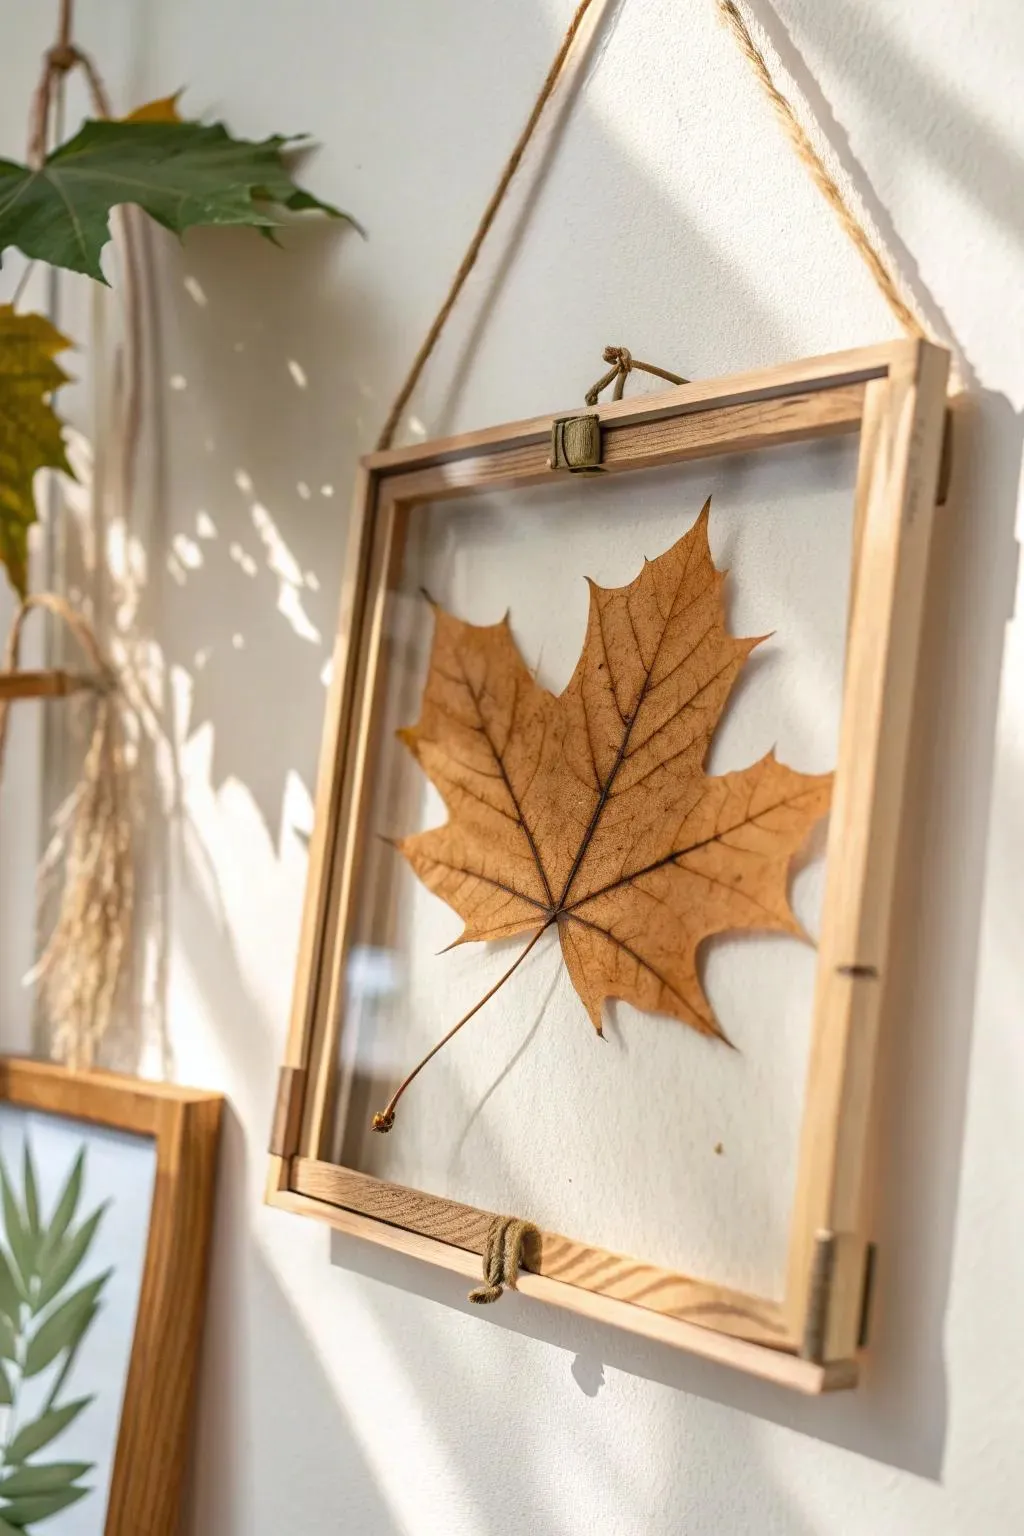
Quick Tip: Press leaves between heavy book pages for at least five days before framing. Flat, fully dry leaves sit neatly between the glass panes and keep their color far longer.
Float one perfect maple or oak leaf between the two panes of a glass sandwich frame and hang it where daylight passes through. The veins show like stained glass, and the frame costs less than most prints. Make a set of three with leaves from your own street and the wall tells the story of your neighborhood in fall.
Leaf Stamped Tea Towels
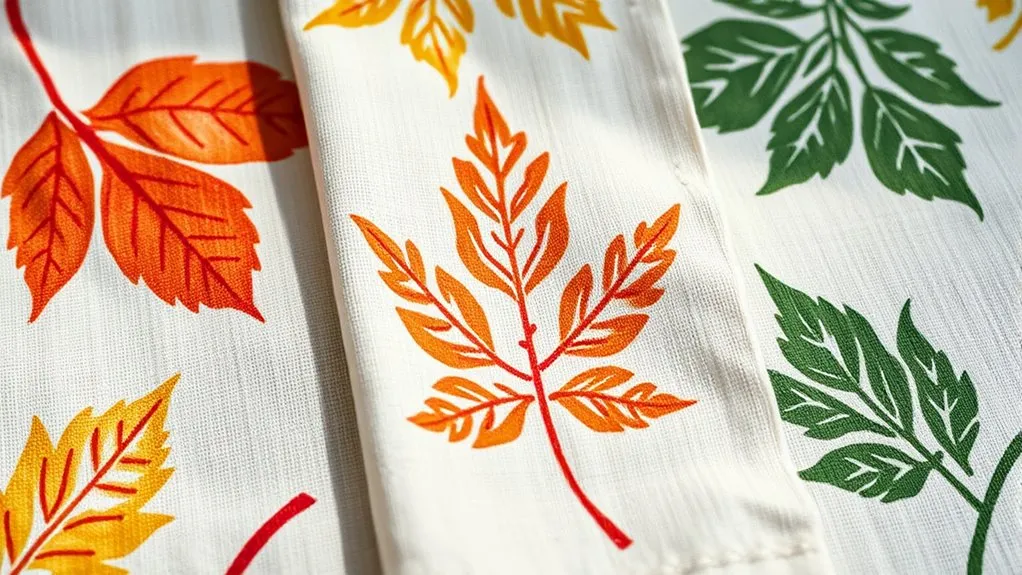
Before: Plain white flour sack towels hang in the kitchen looking clean but forgettable. The drawer also holds acrylic paint in red, orange and gold from a school project.
After: Each towel now carries a row of crisp leaf prints along the bottom edge, made by painting the back of a real leaf and pressing it onto the fabric. The prints look screen printed, and no two leaves match.
Heat set the paint with an iron once the prints dry, and the towels wash without fading. A folded stack tied with twine makes an easy hostess gift, and the practice towel becomes your everyday kitchen cloth.
Candle Ring Centerpiece
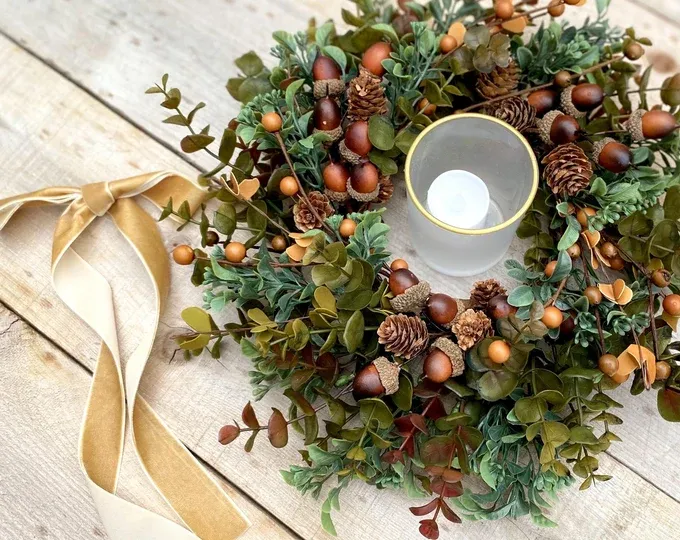
- Start with a wire or grapevine ring about ten inches wide as the base.
- Wire or glue faux leaves, mini pinecones and berries around the ring in small clusters.
- Leave the clusters uneven on purpose; real branches never grow in perfect patterns.
- Set a glass hurricane or a wide candle holder in the center of the ring.
The ring turns a plain candle into a full centerpiece in one move, and it lifts off for cleaning in seconds. Build it on a tray and the whole arrangement travels from the dining table to the coffee table without falling apart.
Burlap Grateful Banner

Do:
- Do cut burlap into even pennant triangles and seal the edges with a thin line of glue.
- Do stencil one letter per pennant in dark brown or black so the word reads across the room.
- Do leave a blank pennant between words for easy reading.
- Do thread the pennants onto jute twine with a little space between each one.
Don’t:
- Don’t skip the edge sealing; raw burlap frays fast once it hangs.
- Don’t use thin paint that soaks in and turns the letters fuzzy.
- Don’t hang it where cooking steam hits it daily.
Words like grateful, thankful or give thanks suit the season, and the banner works over a mantel, a doorway or the dining room window. It folds flat into a drawer in January, taking almost no storage room.
Rustic Pinecone Wreath
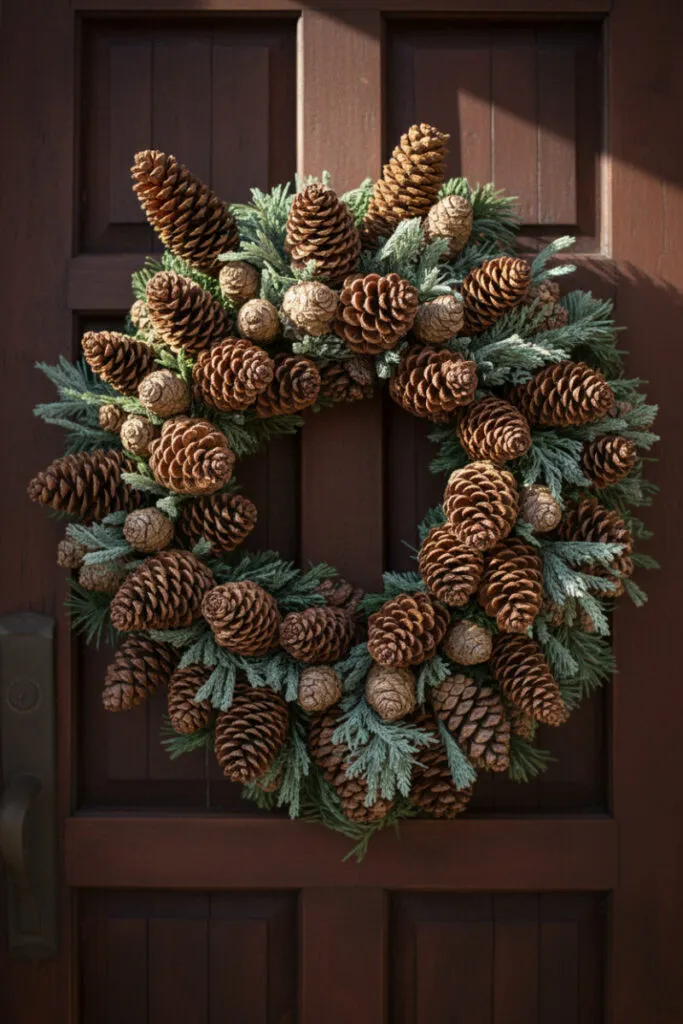
Cost: Almost nothing if you gather your own pinecones
Time: About one hour, mostly gluing
Skill Level: Easy, patience matters more than skill
Best For: Front doors and fireplace walls
Glue pinecones in tight rings onto a wire or foam wreath form, tips pointing outward, until no base shows through. Bake gathered cones first at low heat so they open fully and any insects are gone. A burlap bow at the bottom and a few faux berries between the cones finish a wreath that lasts for years, not weeks.
Painted Stone Pumpkins

Smooth, flat stones from the garden or a river walk become palm sized pumpkins with three paint colors. Paint the whole stone orange, add pale ribs with a thin brush, then paint a small green or brown stem at the top. The weight of the stone does the decorating: these sit still where paper crafts blow away.
Line a windowsill with them, spell a welcome along the porch steps, or set one at each place setting as a gift guests take home. Kids paint these happily alongside adults, and the wonky ones usually earn the best spots. Seal them and they live outside all season.
Paper Bag Pumpkins

- Stuff a brown paper lunch bag loosely with newspaper or scrap paper until it feels plump.
- Twist the top of the bag tightly into a stem shape and wrap it with tape.
- Paint the bag orange, or leave it brown for a rustic, primitive look.
- Paint or wrap the twisted stem green or dark brown.
- Tie raffia or twine around the stem and add a paper leaf.
A whole patch costs less than one real pumpkin, which makes this the project to choose for a classroom, a party table or a long hallway. Different bag sizes give you a family of pumpkins in one afternoon.
Conclusion
Twenty three projects later, the pattern is clear: the best diy fall decorations start with simple supplies and one free afternoon. A wreath, a sign or a small glowing luminary changes how a room feels more than any single store bought piece, because your hands made it. Choose the project that fits the corner you see every day, finish it this weekend, and let that one success pull you into the next. Save this list on Pinterest so the remaining ideas wait for you, and share it with a friend who keeps a glue gun ready. Fall is short. Make something for it.