Deep Fridge Organization Solutions for Better Storage
The back row of a deep fridge is where good food goes to be forgotten, and most of us only find it again when it is far too old to use. These deep fridge organization solutions fix that problem by bringing the back of every shelf within easy reach. Pull out bins, rolling trays, turntables and simple labels turn one deep, dark space into shallow zones you can see at a glance. You do not need to do all thirty ideas at once. Pick the shelf that frustrates you most, start there this week, and you will notice the change at your very next shop, because you will finally know what you already have.
Quick Answer
Keep the back of a deep fridge reachable by storing food in pull out bins, rolling trays and turntables that bring items forward instead of making you reach. Zone each shelf front to back, put daily food at the front, back stock behind it, and label every bin so nothing hides.
Pull Out Clear Bins
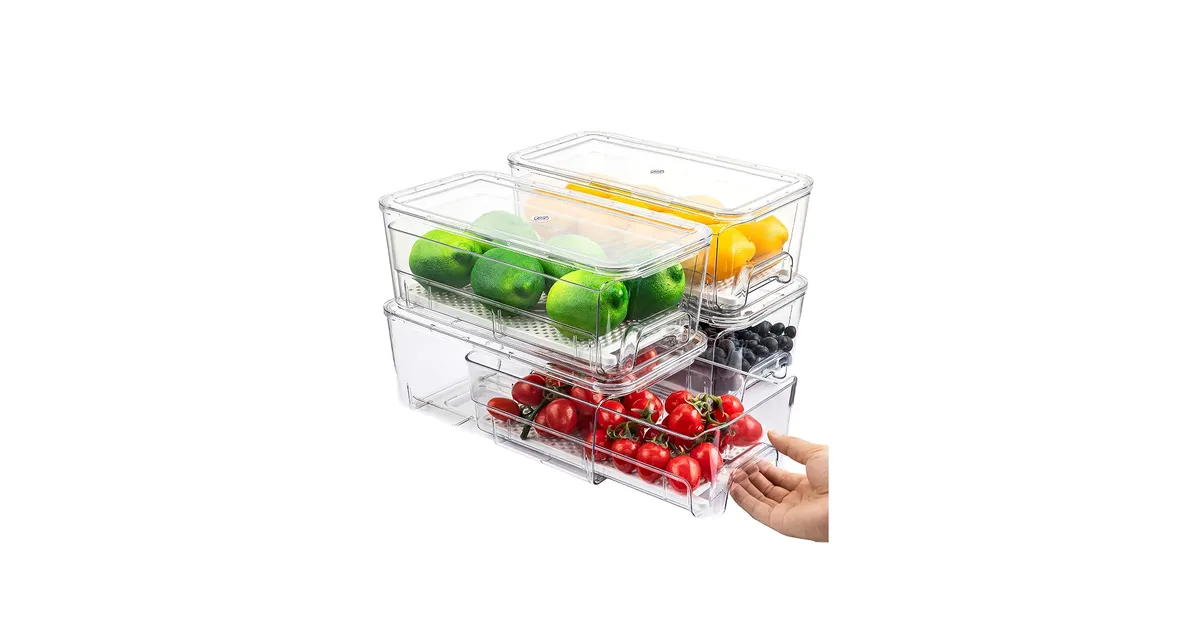
Image Credit: Amazon (https://www.amazon.com/dp/B0FFT45SS4)
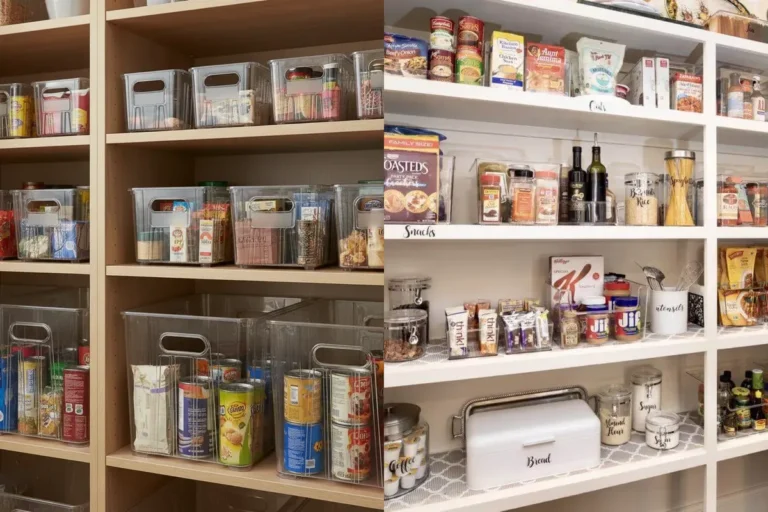
Clear bins that slide turn a deep shelf into a drawer you already understand. Group one food type per bin, drinks in one, lunch items in another, and the whole bin comes out to the counter when you cook. Nothing gets pushed behind anything else, because the bin wall is the back of the shelf now.
Measure your shelf depth before buying, and leave a finger of space at the front so the bin pulls out without catching. In my experience, bins a little narrower than the shelf work best, since two slim bins side by side beat one wide bin that gets heavy and awkward. Start with a single bin if you are unsure; most people come back for a second one within a week.
Square Lazy Susan Turntable
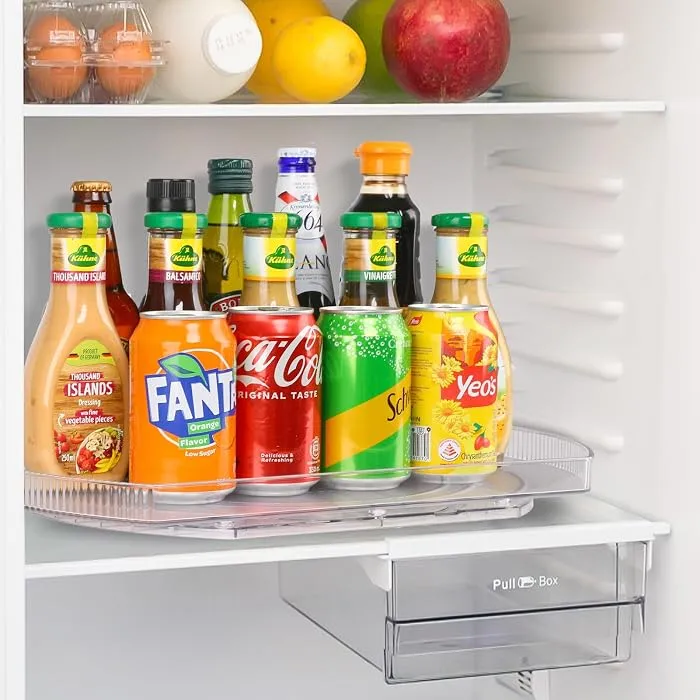
Image Credit: Amazon (https://www.desertcart.com.cy/products/591053396-mepure-lazy-susan-turntable-fridge-organiser-kitchen-spice-carousel-360-rotating-cupboard-organiser-lazy-susan-organiser-turntable-for-kitchen-tables-pantry-and-cupboard)
- Pick a square or rectangle turntable so the corners of the shelf stay useful instead of wasted.
- Load heavy jars in the middle and lighter bottles around the edge for a smooth spin.
- Keep the turntable on the deepest shelf, where jars vanish fastest.
- Spin with one finger before cooking and read every label in two seconds.
- Wipe the base weekly, since sticky rings slow the spin down.
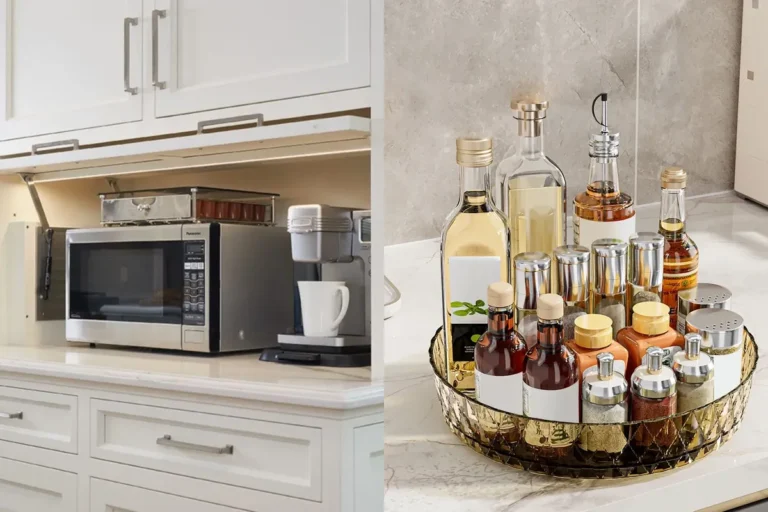
A square lazy Susan turntable fills the shelf edge to edge, corners included, so one spin brings the very back jar to the front with nothing left behind it. Round turntables leave dead corners in a rectangular fridge, and those corners become hiding spots. It is the fastest fix on this list for sauce and condiment shelves.
Roll Out Tray Inserts
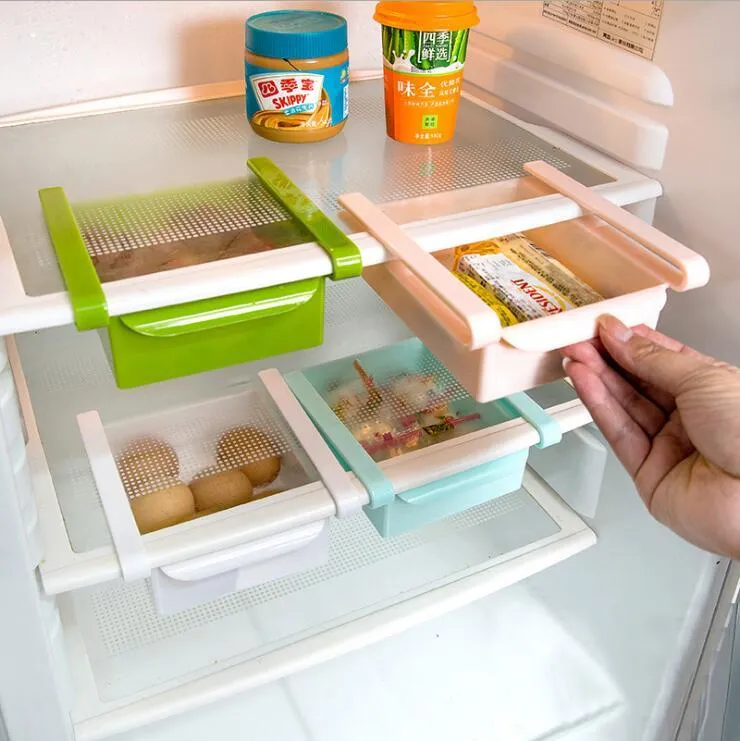
Image Credit: 1BGS (https://cdn.1bgs.sbs/products/2107030)
Quick Tip: Set the tray on the shelf before loading it, then slide it in and out twice. If it catches on the shelf lip, turn it around, since most trays glide better in one direction than the other.
Roll out trays sit under food you already own, like cheese blocks, tubs and leftovers, and bring the whole group forward in one pull. They suit renters and anyone who does not want to rebuild the fridge around new bins. One tray per shelf is enough to change how the shelf feels.
Long Handle Reach Baskets
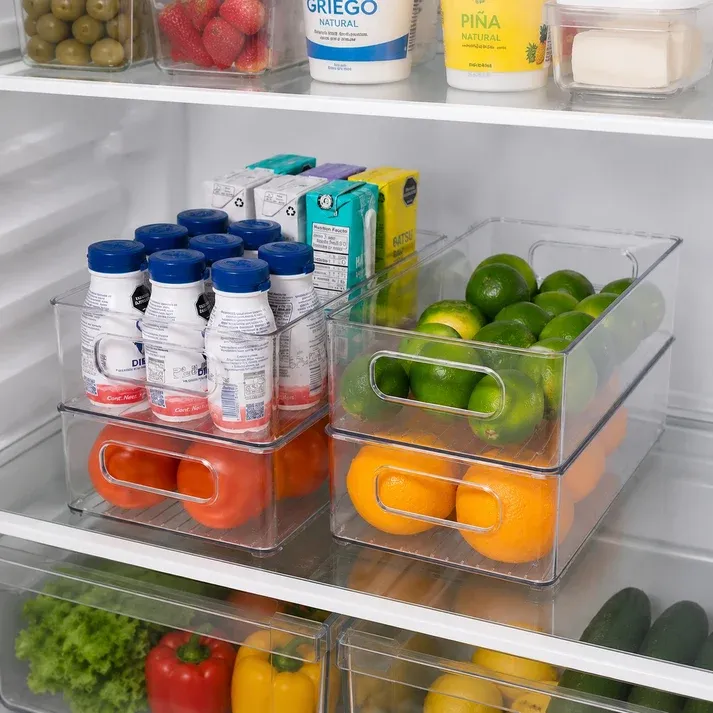
Image Credit: Mis Organizadores (https://misorganizadores.com/products/organizador-caja-apilable-de-nevera)
Before: Snacks and small tubs sat loose on a deep shelf, and every reach knocked something over or pushed a pot further back.
After: One long basket holds the whole group, and the front handle pulls everything out in a single smooth move.
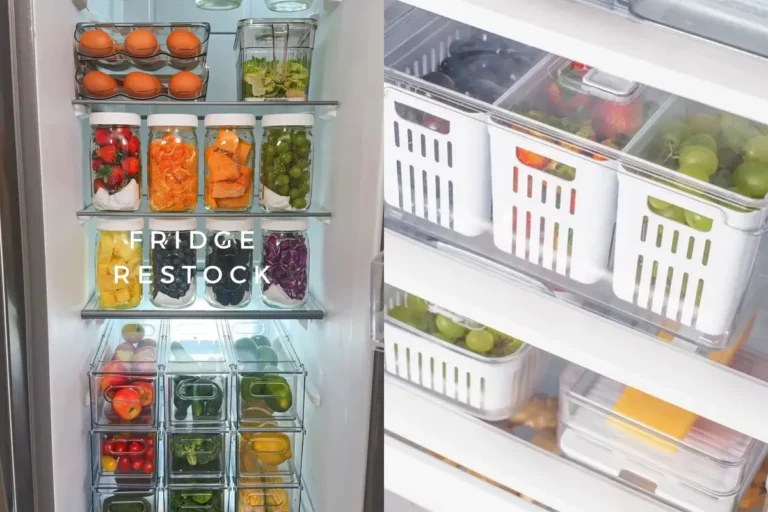
A long handled basket turns a deep shelf into a drawer, because the front handle pulls the whole group out in one smooth move instead of forcing you to drag the basket by its rim. Wire and plastic versions both work, and most hold six to eight small tubs or snack pots, but pick a handle that sits high enough to grab without bending your wrist at a strange angle.
Tiered Stacking Drawer Bins
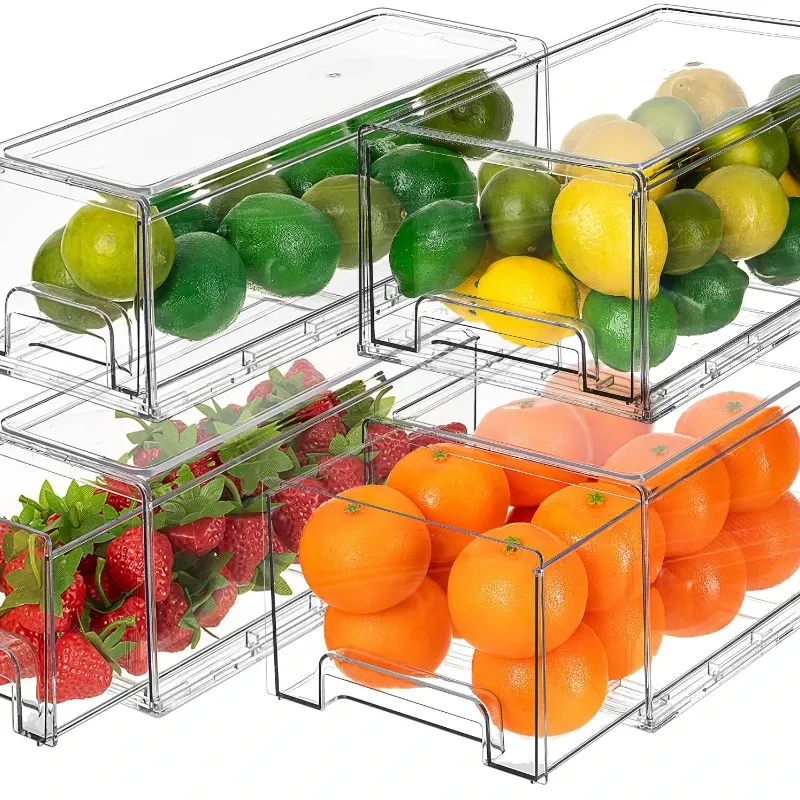
Image Credit: AliExpress (https://imall.net/product/Fridge-Drawers-Clear-Plastic-Stackable-Pull-Out-Refrigerator-Organizer-Bins-Food-Storage-Containers-for-Kitchen-Refrigerato/Home-Garden-Organization/aliexpress.com/1005005580950937/565-255481096/en)
- Empty one deep shelf and wipe it dry.
- Place the widest drawer bin at the back and the shallowest at the front.
- Fill the back drawer with spare stock and the front one with this week’s food.
- Stack a second tier only if you can still see into the top drawer.
- Label each drawer front so the system survives busy days.
Stacking drawers use the full height of a tall shelf while keeping every layer pullable. The back stops being a mystery because each drawer is its own small shelf with its own job. Start with two drawers on one shelf before buying a full set for the whole fridge.
More Info : Refrigerator Organization for Small Spaces Made Simple
Sliding Drawer Shelf Kits
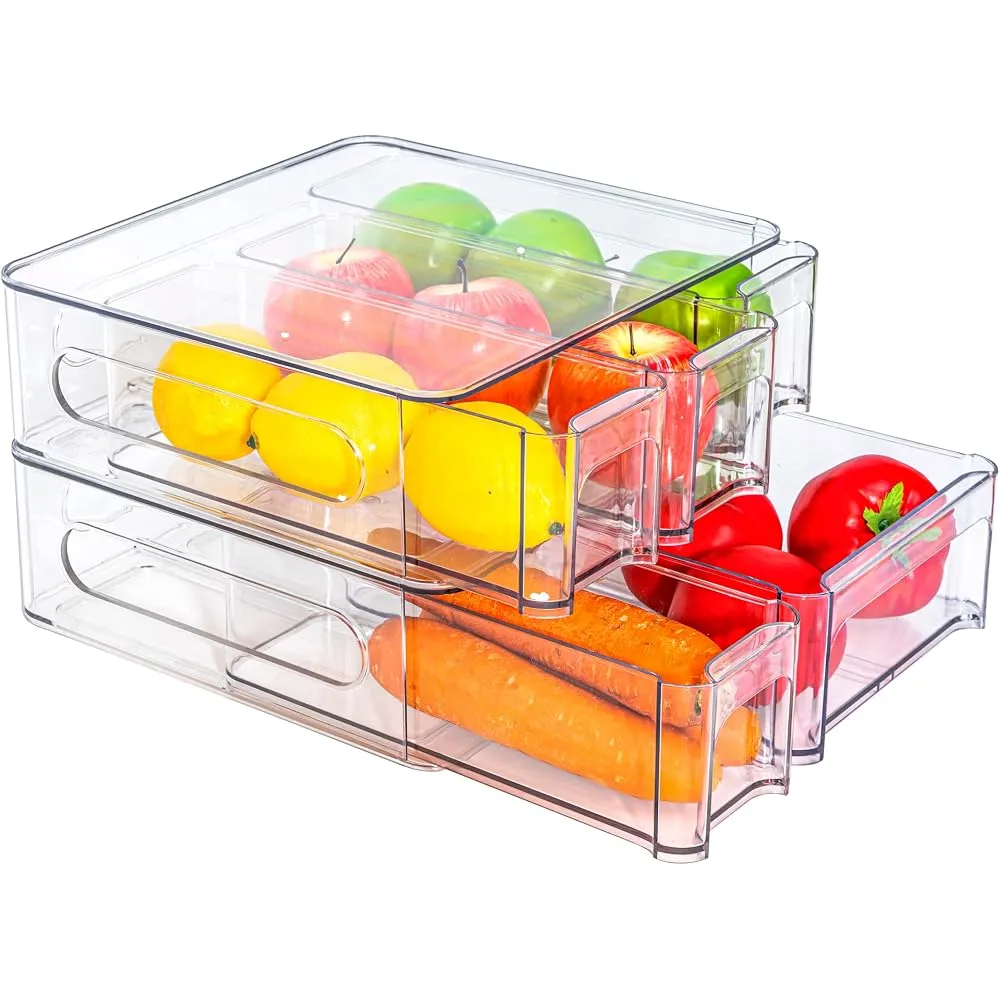
Image Credit: ShopAbunda (https://www.shopabunda.com/products/mano-2pack-stackable-fridge-organizer-drawer-pull-out-bins-clear-refrigerator-drawers-divided-storage-box-plastic-food-containers-set-for-pantry-kitchen-cabinet-dresser-clothes)
Do:
- Measure shelf width and depth twice before ordering a kit.
- Choose kits with smooth runners that lift out for washing.
- Load heavier items in the lowest drawer to keep the pull easy.
Don’t:
- Force a kit onto a shelf with a raised front lip.
- Stack food above the drawer rim where it blocks the slide.
- Skip the test slide before filling every drawer.
Shelf kits add real drawers to a plain deep shelf, and the runners do the reaching for you. They cost more than loose bins, but on the shelf you open ten times a day the smooth pull pays you back every single time. Check the kit height against your tallest bottles first.
Labelled Back Stock Zone
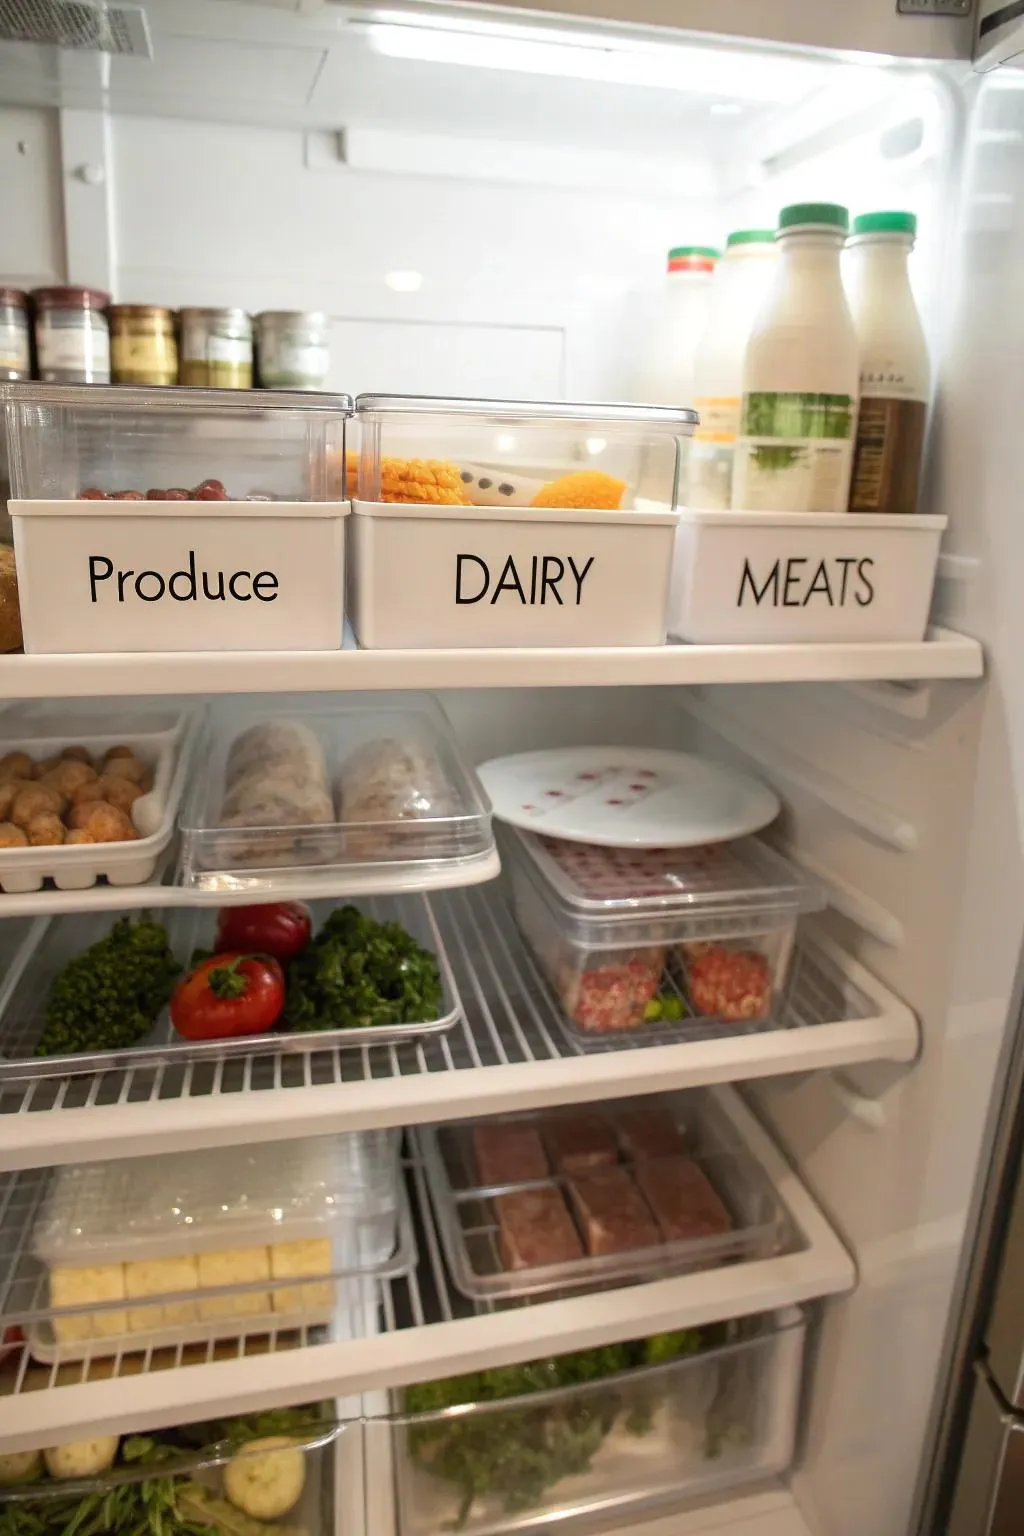
Image Credit: SoulSpire Home (https://soulspirehome.com/blog/refrigerator-ideas-storage/)
Cost: Low, one pack of labels or a roll of masking tape
Time: About 20 minutes for one shelf
Best For: Bulk buyers and big weekly shops
Works In: Any fridge with one spare back corner
A labelled back stock zone keeps spare stock in one marked home, so the second jar of mayo, the backup cheese and the extra butter stop crowding daily food. Give that stock the back of one shelf, label the front edge of the shelf with what lives there, and daily food stays out front. Shopping gets easier too, since one glance shows what is already waiting.
Rolling Can Dispenser Rack
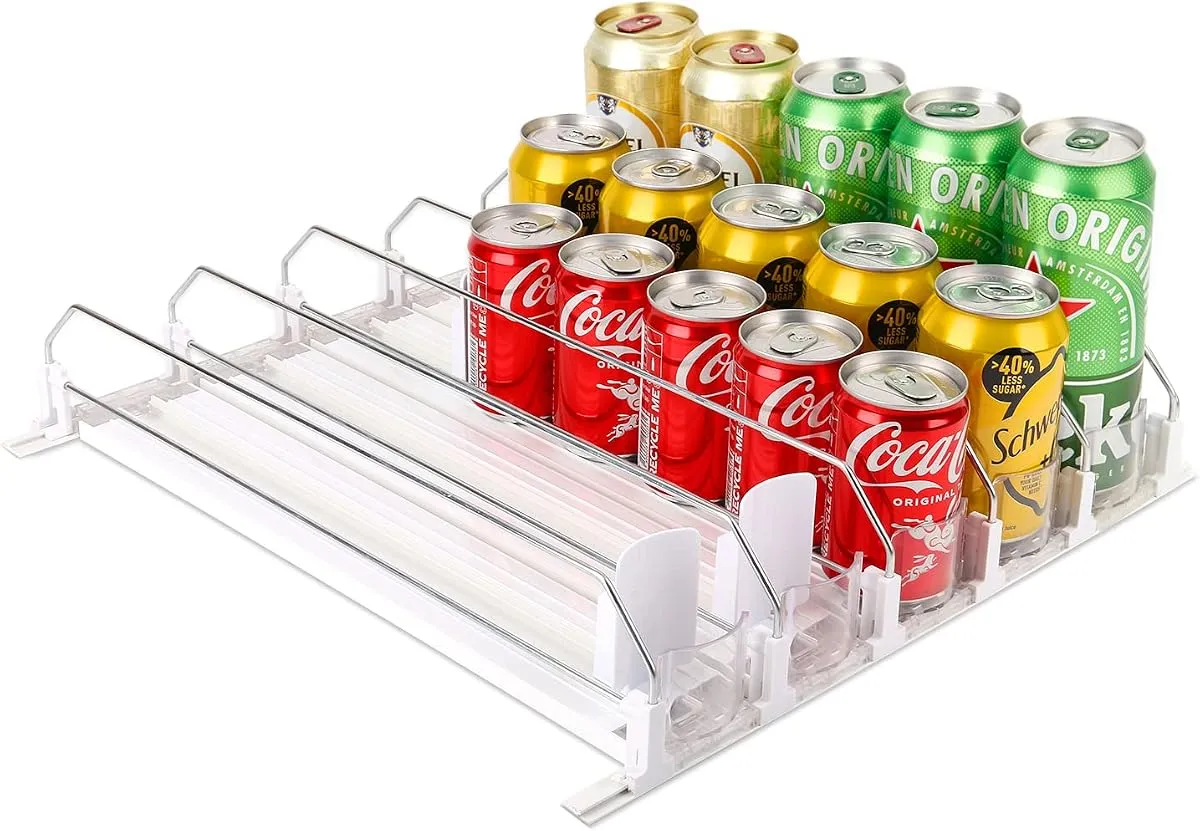
Image Credit: Amazon (https://www.desertcart.co.ke/products/542919349-maxtuf-drink-dispenser-for-fridge-soda-can-organizer-for-refrigerator-adjustable-width-beverage-self-pushing-glide-rack-up-to-25-cans-storage-for-fridge-pantry-white-15-inch-5-rows)
A rolling can dispenser rack loads from the top or back and rolls the next can to the front each time you take one, so the oldest can is always the one you use. Loose cans need that order, because they all look the same from the front and roll where they please.
Set the rack along one side of a deep shelf and keep the lane in front of it clear. Soup, beans and soda all behave in the same rack, most racks hold 10 to 25 cans, and a quick count of the visible cans tells you when to add drinks to the shopping list. Tall cans may need the taller rack size, so check a can against the rack height before ordering.
Rolling Egg Dispenser
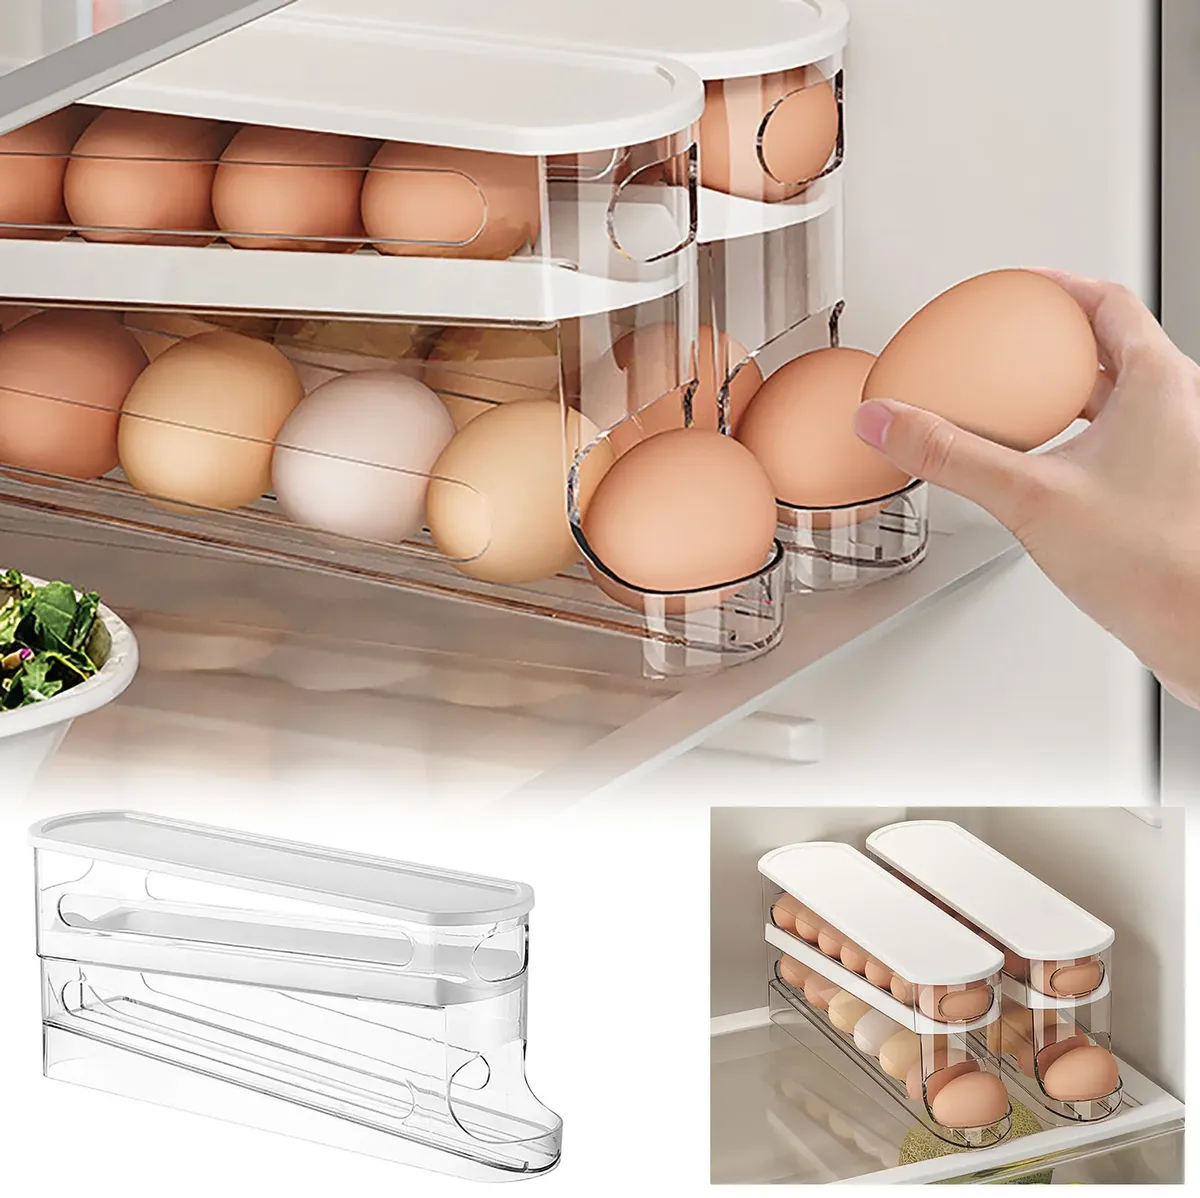
Image Credit: Walmart (https://www.walmart.com/ip/Egg-Dispenser-Fridge-Organizer-Automatic-Rolling-Design-Space-saving-Kitchen-Storage-Sturdy-Tiered-Rack-Protection-Rails-Countertop-Refrigerator-Topl/19430257148)
- Load eggs from the top so the oldest egg always rolls out first.
- Rest the dispenser against the fridge wall so it cannot wander.
- Count the eggs through the clear front before every shop.
- Keep one dozen in the dispenser and spare eggs in their box behind it.
A rolling egg dispenser shows every egg and serves them in the order you bought them, so eggs stop lingering past their best in a box that hides cracks and makes counting a chore. It also frees the shelf in front for daily food. I’ve noticed far fewer cracked shells since the eggs stopped being stacked and shuffled in a cardboard box.
Under Shelf Sliding Baskets

Image Credit: Shopee Singapore (https://shopee.sg/TIGA-Extended-Fridge-Rack-Fresh-Keeping-Storage-Basket-Drawer-Type-Household-Kitchenware-KC10450-i.660992933.21334998367)
Quick Tip: Hang the basket, then load it with the heaviest item you plan to store. If the shelf above bows or the basket tilts, move it to a sturdier glass shelf before filling it fully.
An under shelf sliding basket turns the wasted gap under a shelf into storage for small, light items like herb packs, cheese slices and snack bars, and it pulls forward when you need them. Two baskets on one shelf double the gain without touching the shelf below.
Front Row Grab Zone
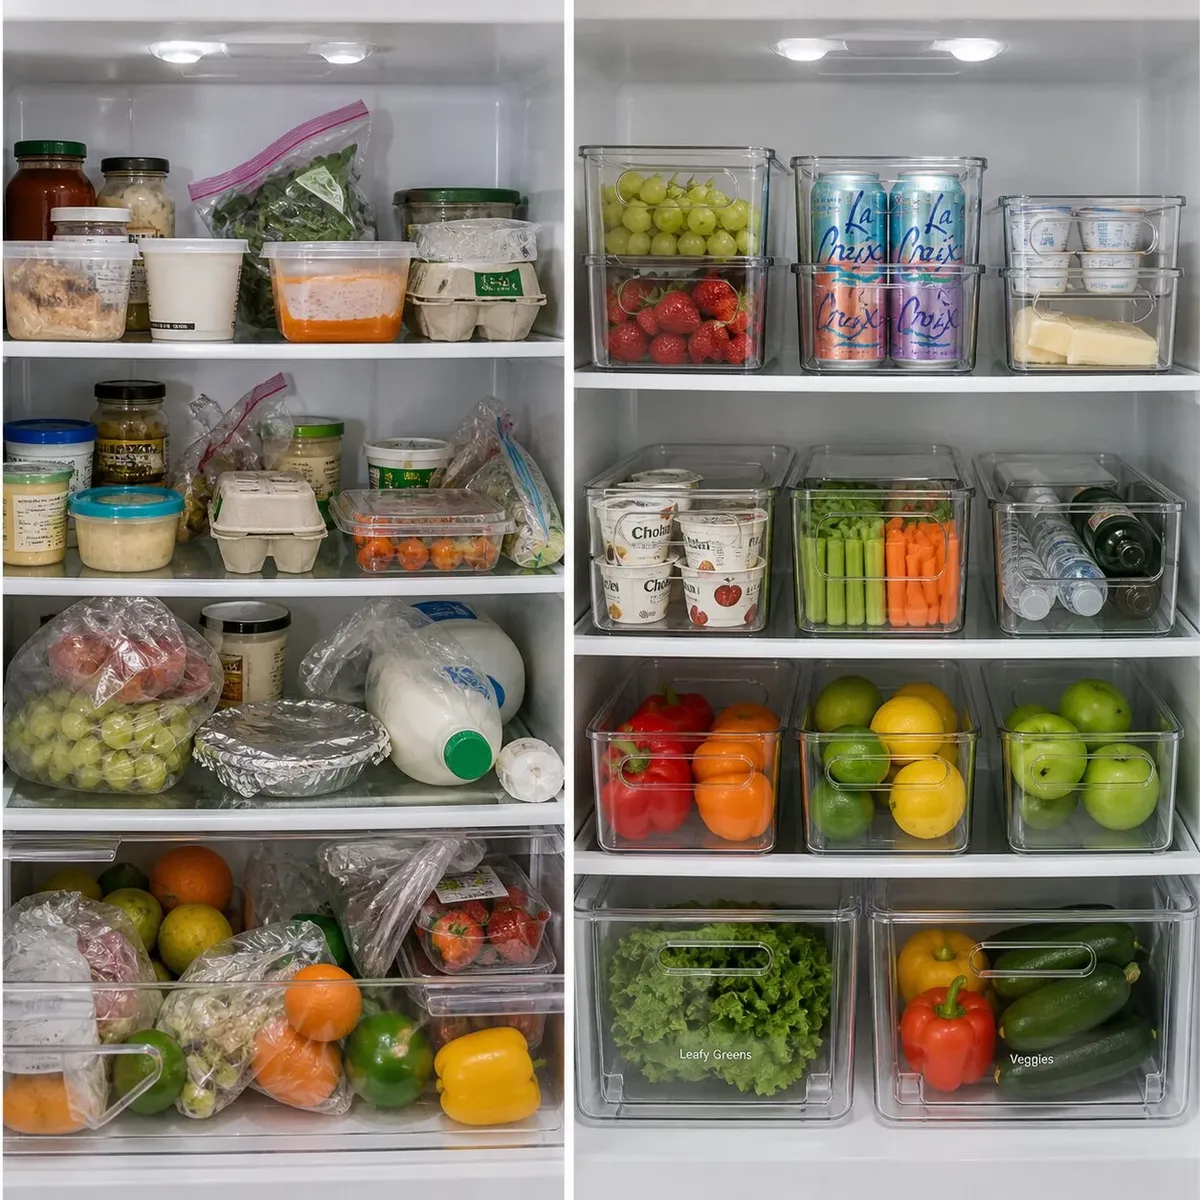
Image Credit: Shami Trends (https://shamitrends.com/practical-kitchen-organization-essentials-youll-wish-you-bought-sooner/)
Before: Breakfast items hid behind leftovers and tall bottles, so mornings meant moving five things to find the jam.
After: A shallow front strip holds jam, butter and milk at grab height, and nothing daily lives behind anything else.
A front row grab zone keeps daily food in a strict front strip, one item deep, so nothing you touch every day ever sits behind anything else. Push storage food behind that strip in bins, since depth only hurts when daily food lives at the back. The rule takes a week to stick, then the fridge starts to feel half as deep as it really is.
Stackable Square Containers
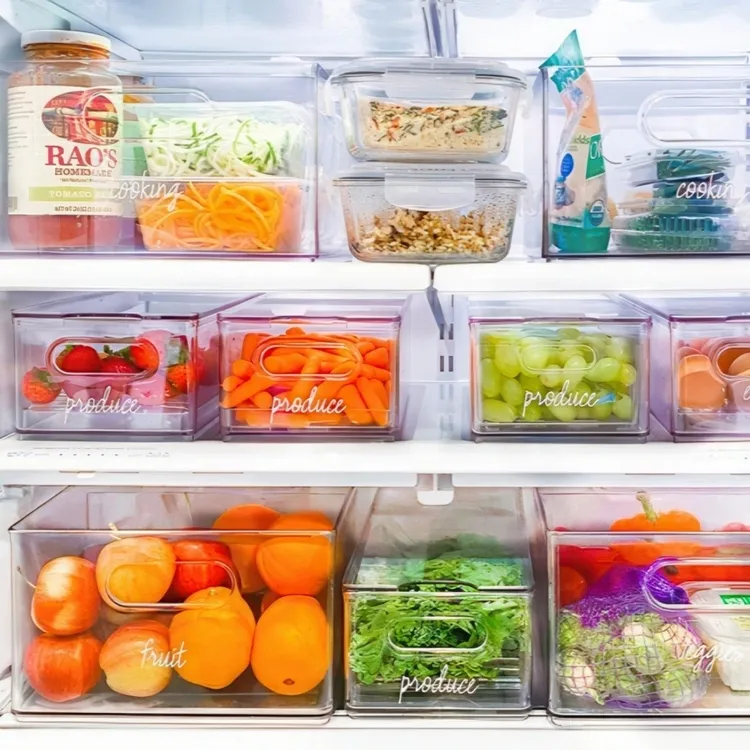
Image Credit: Smartasaker (https://www.smartasaker.com/en/storage-box-the-home-edit-produce-bin-152-x-305-x-h108-cm-transparent)
- Pick one square size that stacks neatly on your shelf.
- Fill, cool and label each container before it goes in.
- Line the rows front to back, oldest food at the front.
- Leave one empty container ready for tonight’s leftovers.
Stackable square containers stack into a tidy block that uses the whole depth of a shelf, and the block slides forward as one when you need the back row. Round tubs waste the corners of a rectangular shelf and topple when you reach past them. Matching lids end the hunt for the right top, too.
More Content : Simple Small Fridge Organization Ideas That Work
First In First Out Rows
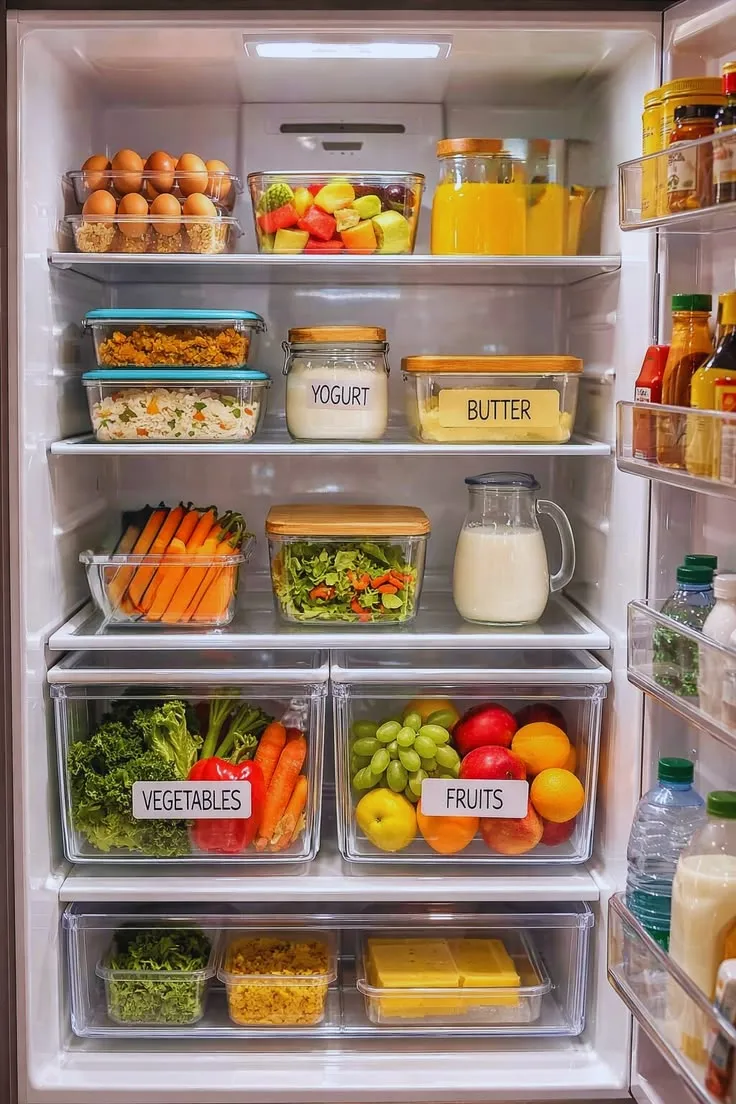
Image Credit: Pinterest (https://www.pinterest.com/pin/2885187256451688)
Do:
- Slide older food to the front every time you unpack shopping.
- Keep one row per food type so the order stays obvious.
- Eat from the front of the row all week without thinking.
Don’t:
- Drop new food in front of old food when you are in a hurry.
- Mix raw meat rows with ready to eat rows.
- Let anyone restack a row without moving the oldest items forward.
First in first out rows line each food up with the oldest at the front, so the oldest stock gets used first and nothing expires in hiding. Cafes run their kitchens this way for a reason, and at home the habit takes ten seconds per shop. The row does the remembering for you, which matters most on the deepest shelf where dates are hardest to check.
Divider Trays For Drawers

Image Credit: Niuhom (http://niuhom-ee.integralis360.website/shop/product/organizador-multiuso-con-divisiones-para-refrigerador-301341-30-5-x-20-x-9-5cm-39252)
Cost: Low to medium, depending on size
Time: Five minutes to fit
Best For: Wide crisper and deli drawers
Result: Small items stop migrating to the back corners
A divider tray splits a deep crisper drawer into lanes, so peppers stop rolling under lettuce and each vegetable group stays in its own lane, with the back lane still its own tray you can lift out. Wash the tray, not the whole drawer, when spills happen.
Back Shelf Light Strips
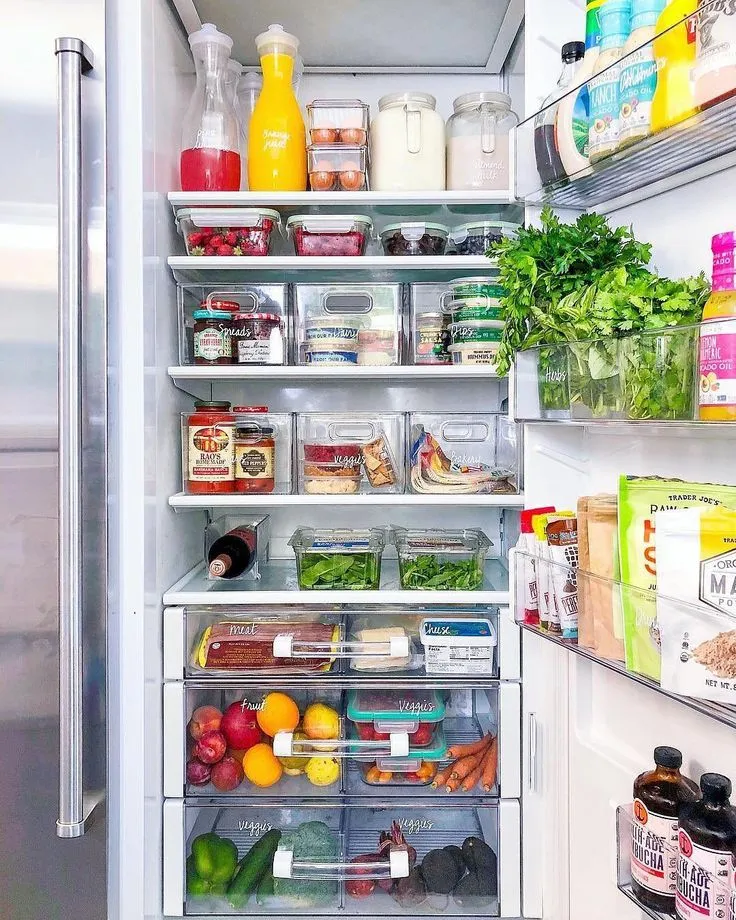
Image Credit: Pinterest (https://storage.googleapis.com/dapqdhxughtple/good-housekeeping-refrigerator-ratings.html)
A battery light strip stuck under the shelf above fixes the shadow at the back of a deep shelf in minutes, so good food stops being overlooked for days. Many back rows are not badly organized, just badly lit: the fridge light sits at the front or top, and tall bottles throw the back into shade.
Choose a strip with a motion sensor so it only wakes when the door opens, and stick it pointing down at the back half of the shelf. I’ve seen this work well in older fridges especially, where one dim bulb was never going to show what hides behind the milk. The strips cost little and the batteries last for months, since the light only runs while you stand there choosing.
Grip Shelf Liner Mats

Image Credit: Amazon (https://shoptheworld.in/hiki-ziki-1rolls-premium-refrigerator-mats-pvc-shelf-liner-for-kitchen/p/b08bzmjvr3)
- Cut the mat to the full depth of the shelf, not just the front half.
- Choose a textured mat that bottles and tubs grip instead of skating on.
- Let the mat peek out at the front edge as a pull tab.
- Lift and rinse the mat weekly instead of scrubbing the shelf.
A grippy mat turns the shelf itself into a slow, simple tray. A gentle tug on the front edge brings the whole row an inch or two closer, and small tubs stop sliding backwards every time the door shuts. It is the cheapest idea on this list and a kind first step.
Upright Bin Divider Inserts
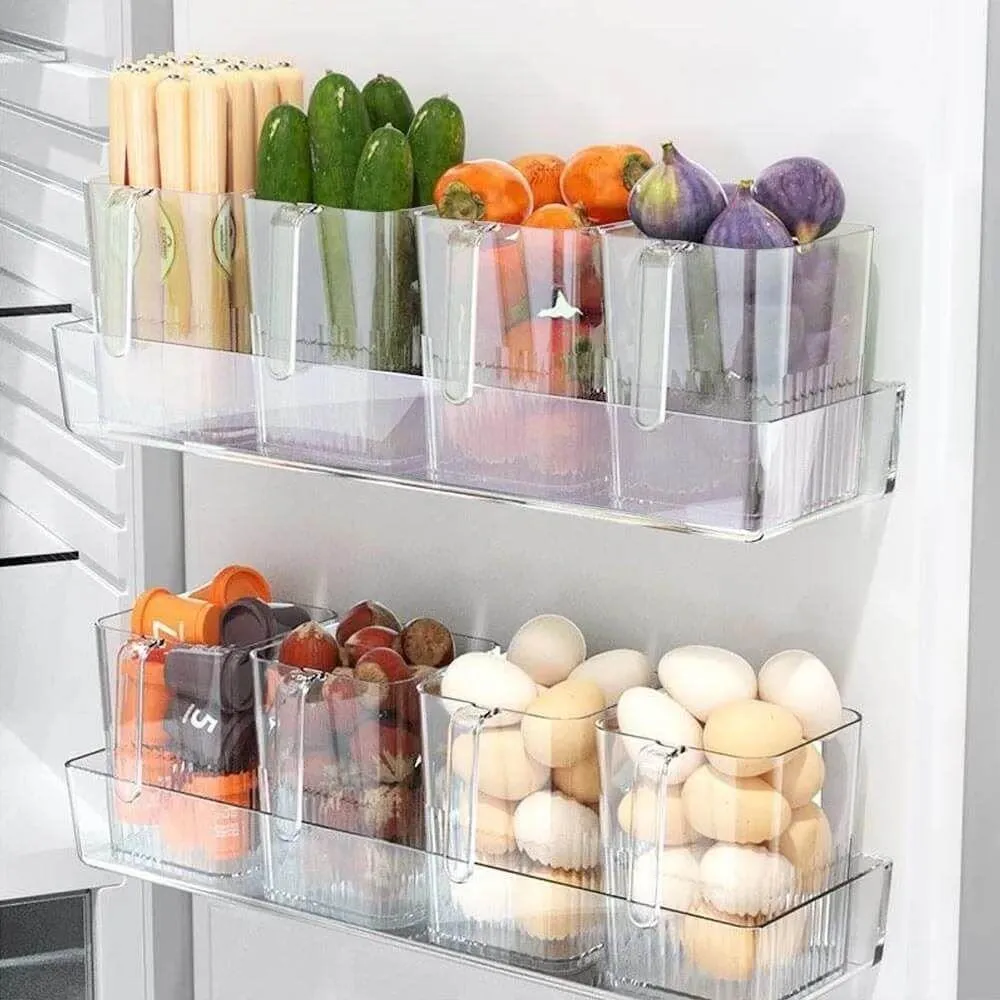
Image Credit: Cadouri (https://www.cadouri.ro/organizator-transparent-pentru-frigider-si-camara-cu-maner)
Quick Tip: Set the dividers wider than you think for the first week. Tight lanes look neat on day one, then real life shopping arrives in odd shapes and the system gets abandoned.
Dividers turn one wide bin into upright lanes, so packets, pouches and small boxes stand in rows instead of slumping into a pile at the back. Standing items show their labels, and a lane can be lifted out by its divider when you cook. This works especially well for cheese and deli drawers.
Two Bin Shelf System
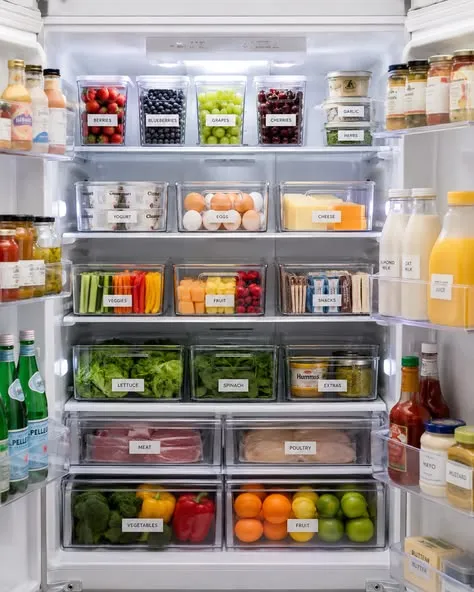
Image Credit: Pinterest (https://www.pinterest.jp/pin/4605634408353186944/)
Before: One deep shelf held a loose crowd of jars, tubs and bottles, and finding anything meant unloading half of it.
After: Two bins split the shelf, cooking items on the left, lunch items on the right, each bin pulling out on its own.
Two bins are easier to keep honest than five. Each bin gets one job, and when a bin is full, the rule is simple: something comes out before anything new goes in. The split also helps families, since each person learns exactly which bin to raid.
Bottle Roll Cradles
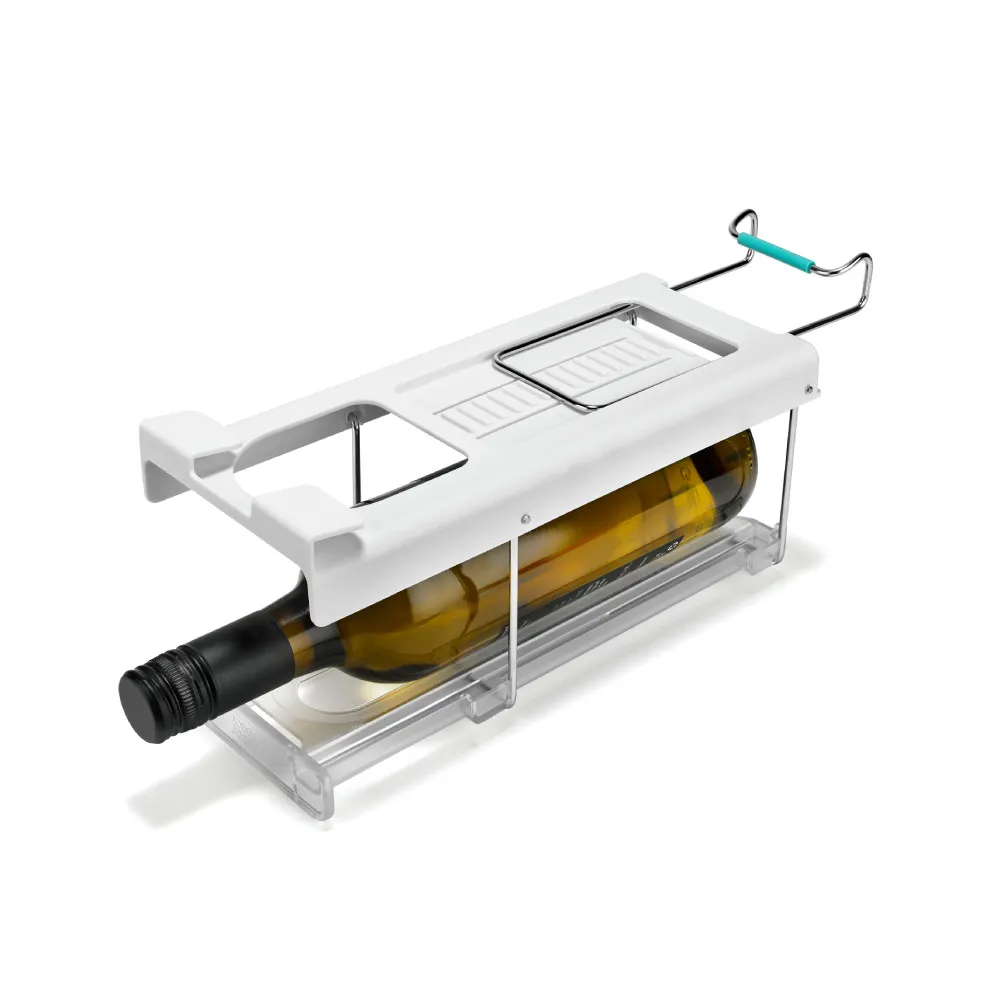
Image Credit: HSW (https://www.hsw.com.au/joseph-joseph-fridgestore-under-shelf-collapsible-bottle-holder/)
- Measure the shelf where bottles lie down and note the clear height.
- Clip or set the cradle at the back of that shelf.
- Lay the first bottle in and let it settle into the curve.
- Add bottles behind it, one per groove, caps facing forward.
A bottle roll cradle holds each bottle in its own curve, stacked or in a row, so the back bottle is as easy to lift as the front one and loose bottles stop rolling to the back wall and clinking every time the door moves. Wine, water and sauce bottles all behave better corralled.
Produce Keeper Pull Trays
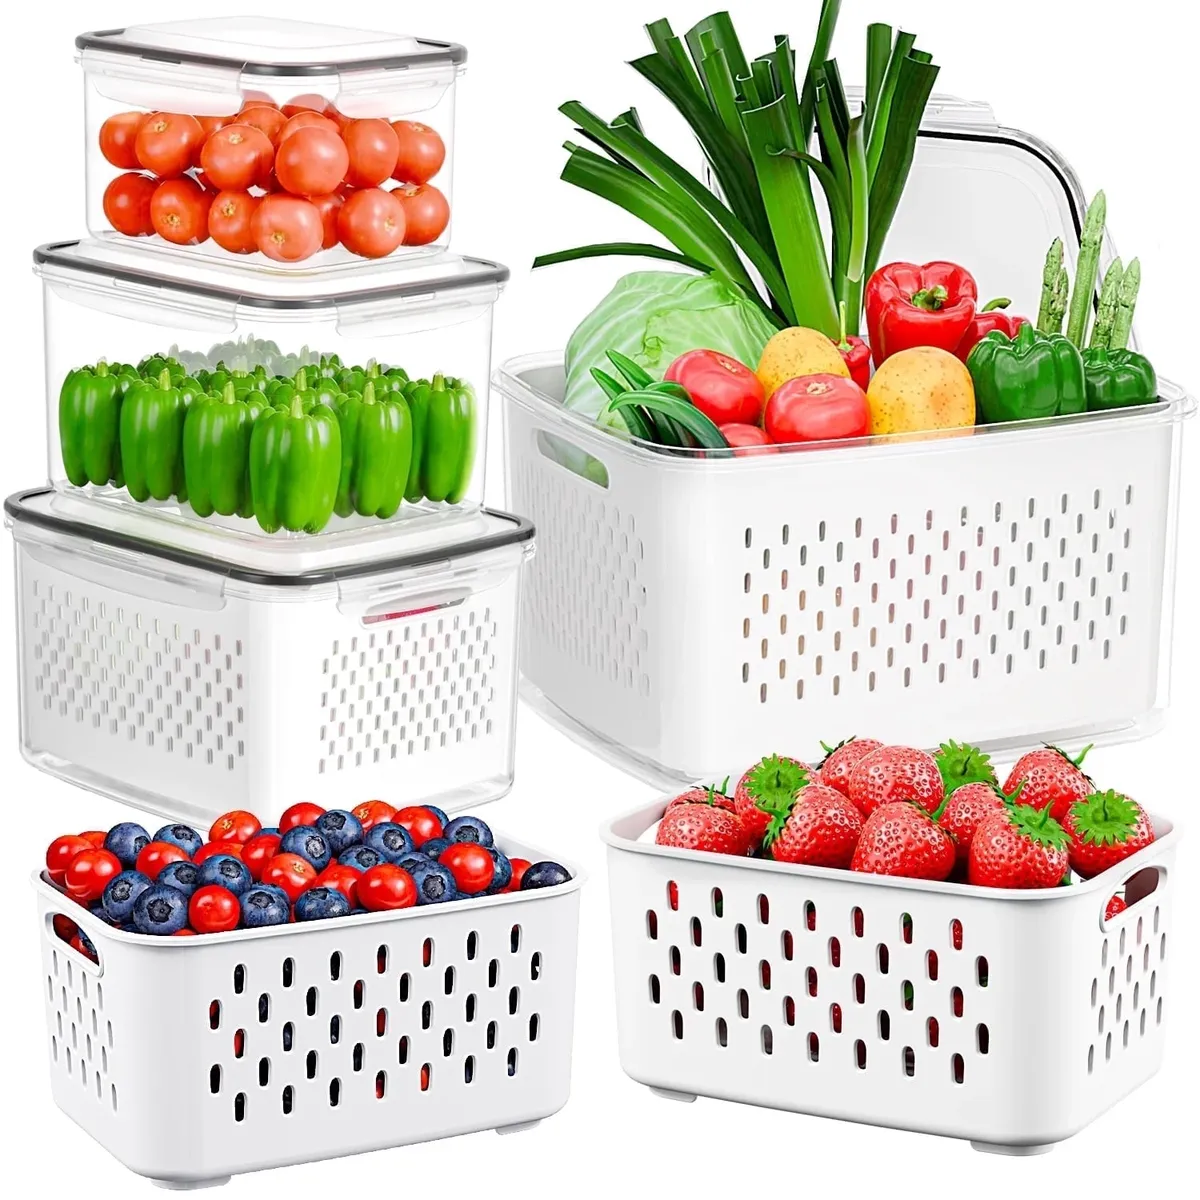
Image Credit: Walmart (https://www.walmart.com/ip/Fruit-Storage-Container-Fridge-Fresh-Food-Produce-Saver-Containers-Removable-Drain-Colanders-Vegetable-Lettuce-Keeper-Bowl-Refrigerator-Organizer-4-P/15658909376)
Do:
- Dry greens well before the tray goes back in.
- Keep the tray at the front of the crisper zone for daily salads.
- Use the drain base to keep leaves off standing water.
Don’t:
- Pack the tray so full that the lid crushes the top layer.
- Store cut fruit beside strong smelling onions in one tray.
- Forget the tray at the back of a shelf where it becomes a drawer.
A produce keeper pull tray with a handle or a low front lip pulls out like a drawer, so salad items stop wilting unseen behind the milk. In my experience, greens last two to four days longer when they live in one vented tray instead of a loose bag.
Color Coded Family Zones
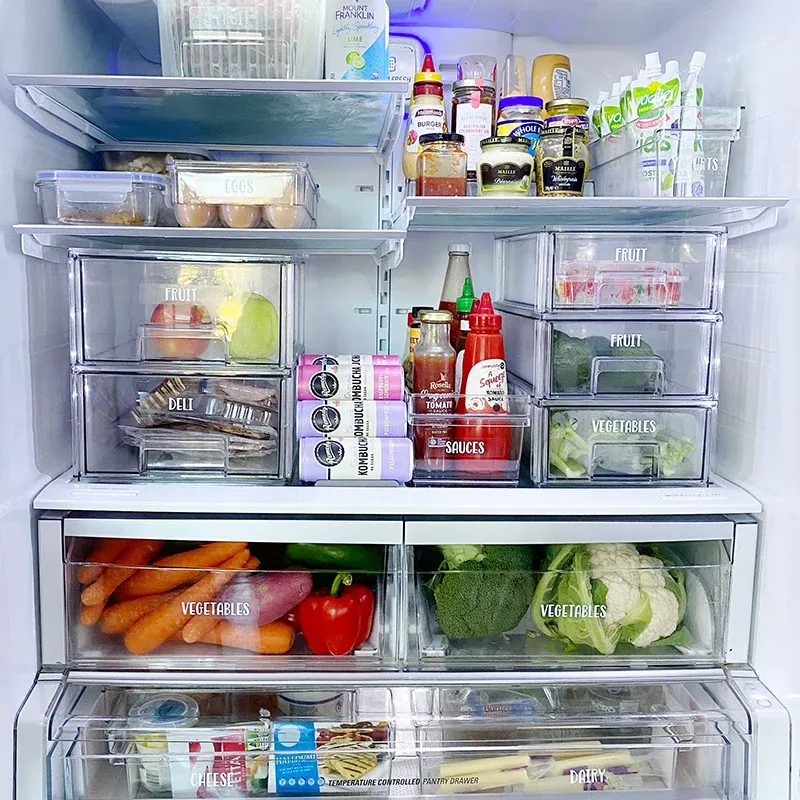
Image Credit: The Pretty Pantry Labels (https://www.prettypantrylabels.com.au/)
Cost: Low, coloured tape or one set of tinted bins
Time: One afternoon to set up
Best For: Busy family fridges and shared kitchens
Rule: One colour per person or per meal type
Color coded family zones end the daily fridge search party by giving each person or each job a colour, blue for lunch boxes, red for tonight’s dinner parts, green for snacks, so the back of the fridge becomes readable at a glance. Kids follow a colour rule far better than a shelf rule, and guests stop asking where things live.
Freezer Pull Out Baskets
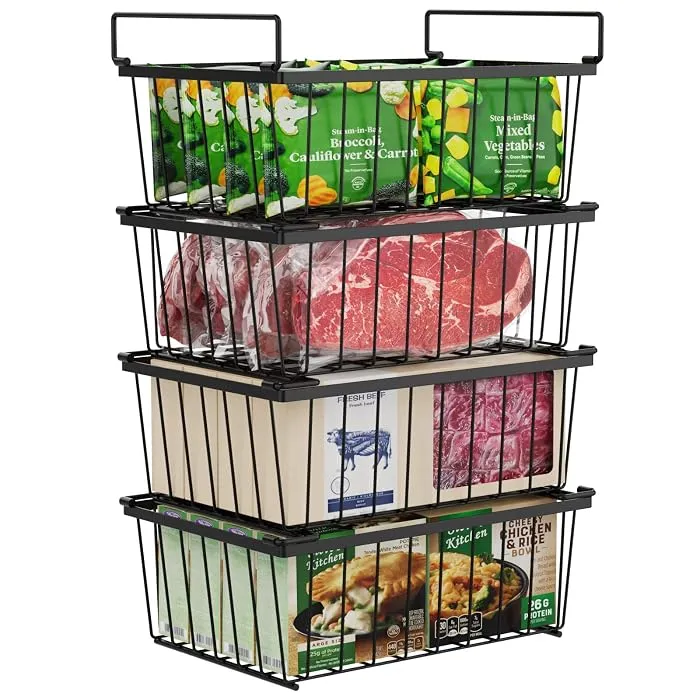
Image Credit: Amazon (https://www.desertcart.com.cy/products/625156674-i-specle-freezer-organizer-bins-4-pack-stackable-chest-freezer-organizer-for-5-cu-ft-deep-freezer-sort-frozen-food-deep-freezer-organizer-bins-easy-to-get-food-from-bottom-better-ventilation-black)
Freezer pull out baskets turn the deepest box in the kitchen into lift out layers, one basket for meat, one for vegetables, one for bread and ready meals, so nothing gets buried in the frostbitten back corners like a lost property office. A flat bag of peas from spring is not dinner, it is a space thief, and baskets make those thieves easy to spot.
Pick baskets with real handles and a little air space around them so cold air still moves. When you need the bottom layer, lift the top basket out and set it on the counter instead of digging. The whole job takes seconds and nothing gets buried twice.
Clip On Door Extenders
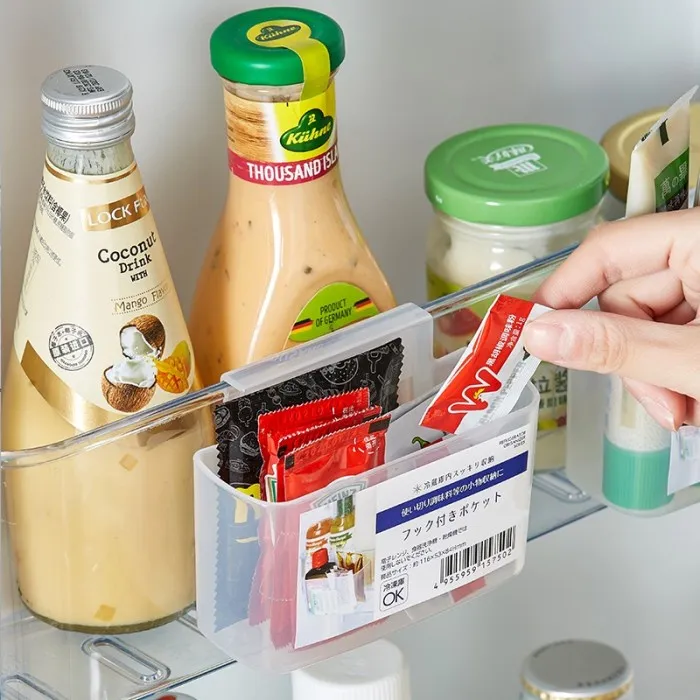
Image Credit: Shopee Indonesia (https://shopee.co.id/product/176903606/21945131123)
- Clip the extender onto the front lip of a door bin.
- Fill it with the smallest items first, packets, tubes and mini jars.
- Keep heavy bottles in the main bin where the shelf is strongest.
- Add one extender per door bin rather than crowding one shelf.
A clip on door extender adds a shallow front pocket at eye level on a deep door bin, perfect for stock cubes, sauce sachets and medicine that would otherwise sink behind tall bottles where nobody sees them. It uses space the door already has and brings the tiniest items forward.
Write On Bin Labels

Image Credit: Etsy (https://www.etsy.com/listing/4456497600/fridge-organization-labels-minimal)
Quick Tip: Write the date the food went in, not just its name. A bin that says chicken and a date beats a bin that says chicken in beautiful letters but tells you nothing on day five.
Labels rescue the back row because they speak for food you cannot see properly. A write on label on the front of each bin tells you what is inside and when it went in, so the back bin gets checked instead of ignored. Chalk pens and dry erase labels both wipe clean for the next round.
Wheeled Shelf Caddy

Image Credit: Amazon (https://www.cart2india.com/pullout-organizers/minesign-2pack-roll-out-fridge-caddy-bins-pull-out-drawer-with-wheels-refrigerator-organizer-bins-with-handles-divided-fruit-caddy-for-fridge-pantry-cabinet-storage-cans-drinks/00000000004398242759)
Before: Drinks and jars at the back of a low shelf meant kneeling and reaching past everything in front.
After: A wheeled caddy rolls the whole back group out to the front with one pull on its handle.
A wheeled shelf caddy glides instead of scraping, so the whole back group rolls out to the front and heavy jars travel safely while the shelf stays clean underneath. It shines on the lowest shelf, where bending and reaching are hardest and where heavy drinks usually end up, and most caddies are rated for 15 to 20 pounds.
Stackable Bottle Holder
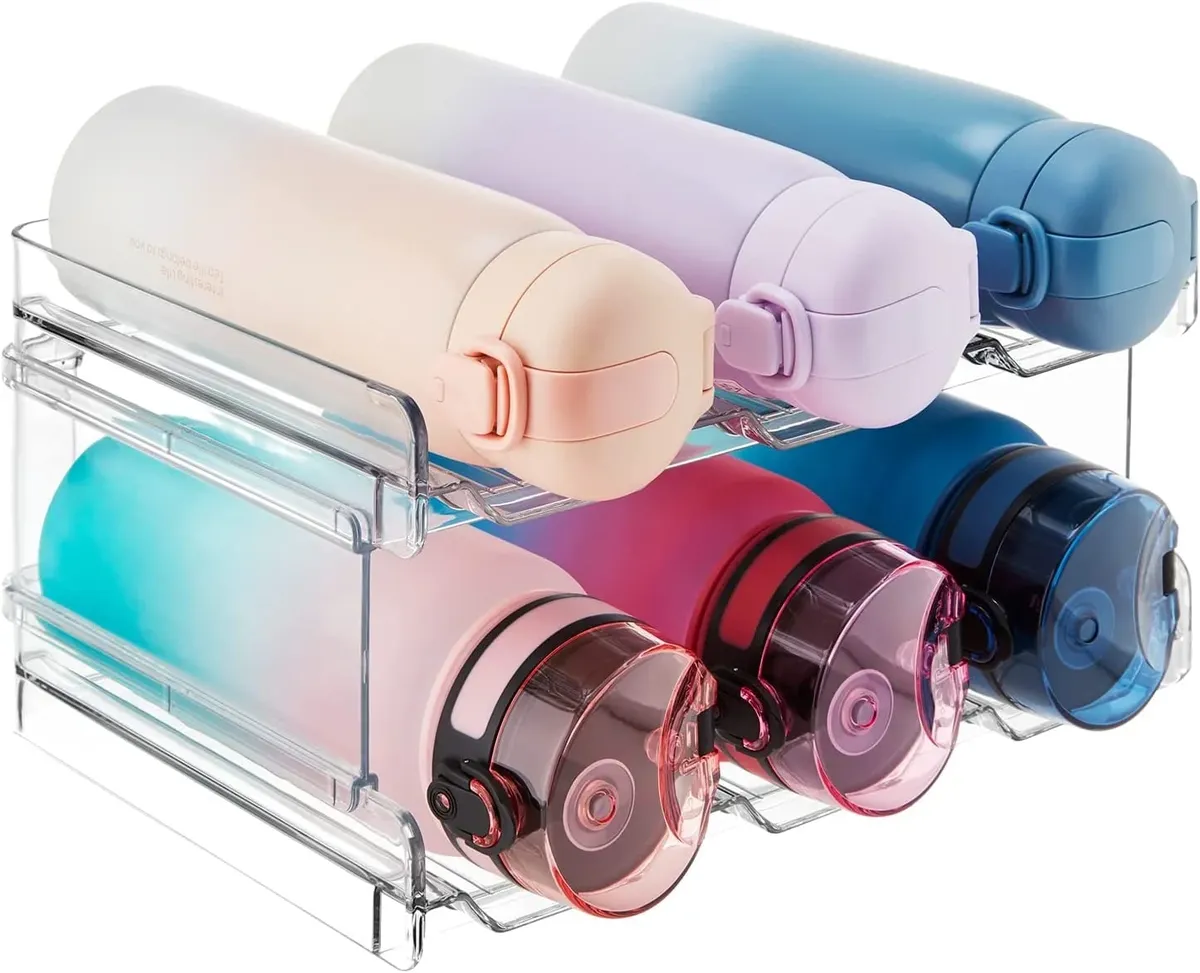
Image Credit: Walmart (https://www.walmart.com/ip/Lifewit-Stackable-Water-Bottle-Organizer-for-Cabinet-Freezer-Clear-Plastic-Pack-of-2/1254373460)
- Clear one shelf section wide enough for the holder.
- Set the first layer down and lay bottles in the grooves.
- Clip the second layer on top only when the first sits steady.
- Keep caps facing out so brands and dates read at a glance.
A stackable bottle holder lays bottles in neat, visible rows and builds up instead of back, so the deepest row is the top one you can see over and upright bottles stop eating shelf height and toppling into the back. Start with two layers; three can make the front bottles awkward in short fridges.
Stacked Can Loft Rack

Image Credit: Fridges Reviews (https://fridgesreviews.com/)
Do:
- Load the loft from the back so cans queue toward the front.
- Keep one flavour per lane to protect the order.
- Check the front can dates during your weekly tidy.
Don’t:
- Mix dented cans into the rack where they jam the roll.
- Stack a second loft on a shelf that already sags.
- Hide the loft behind tall boxes where its queue is invisible.
A loft rack gives cans a second storey, and gravity keeps the queue honest as each front can leaves. The back of the shelf finally does useful work, holding the line of cans in order instead of hiding random tins. It pairs well with the dispenser rack on the shelf above or below.
Stacking Egg Tray Rows
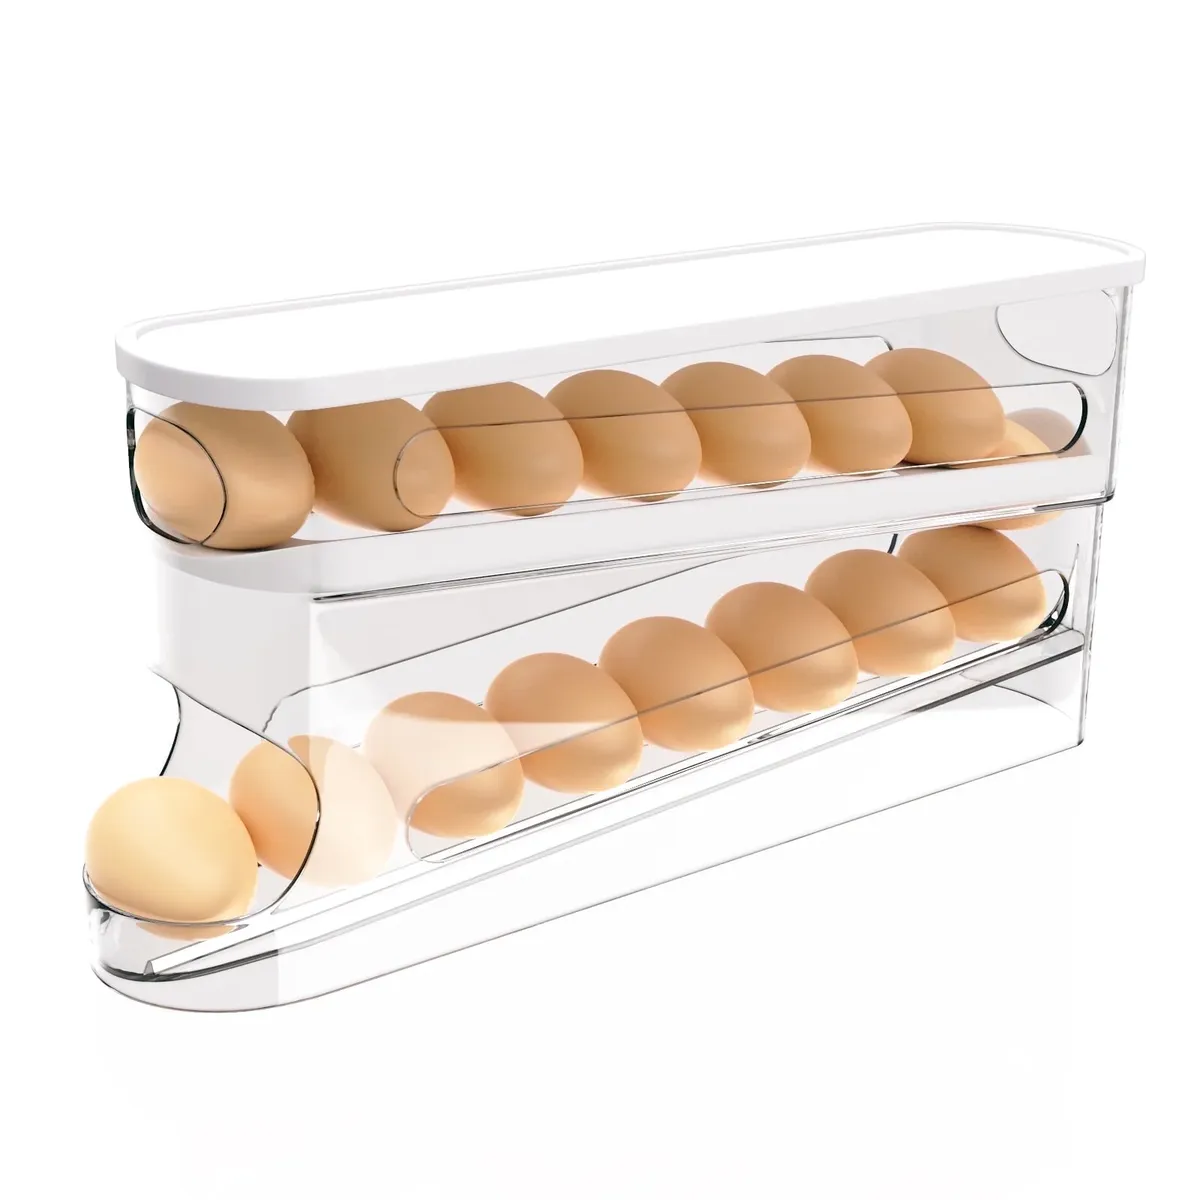
Image Credit: Walmart (https://www.walmart.com/ip/Refrigerator-Egg-Trays-Auto-Rolling-Fridge-Egg-Organizer-Space-Saving-Eggs-Dispenser-for-Refrigerator-Storager-Home-Egg-Holder/14761520542)
Cost: Low
Time: Two minutes to load
Best For: Big egg buyers and baking households
Capacity: Two dozen eggs in the footprint of one dozen
Stacking trays store eggs in two shallow rows instead of one deep box, so every egg stays visible and the oldest row sits on top where it gets used first. Clear lids let you count without opening anything. Keep the stack near the front of a shelf, since eggs are a daily grab in most homes.
Pouch And Snack Bins
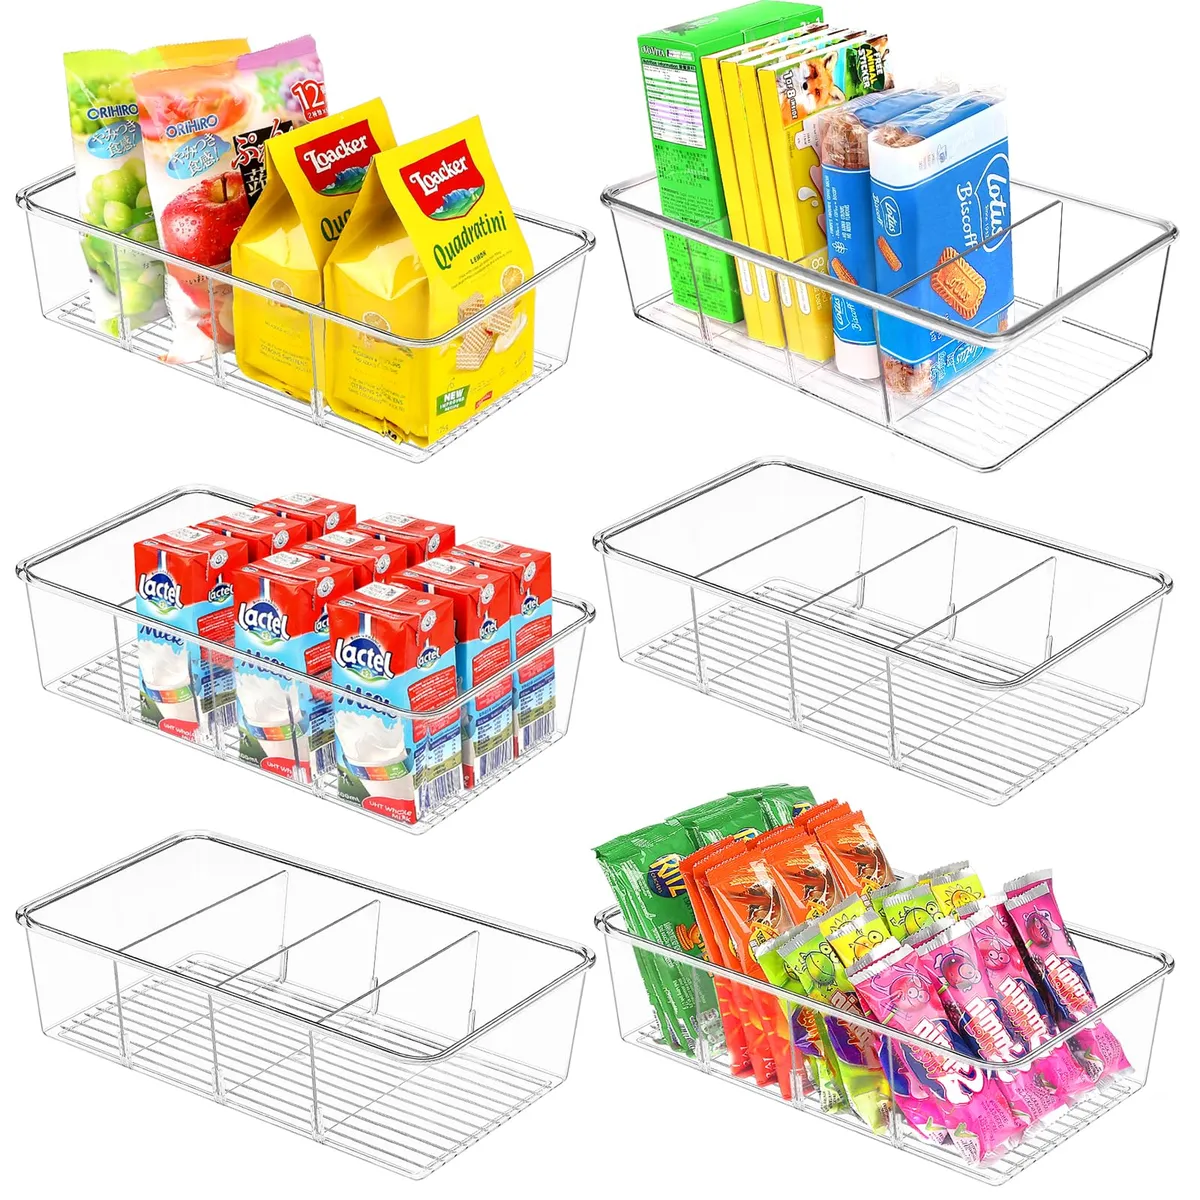
Image Credit: Amazon (https://cadeals.couponbirds.com/p/8601wmw5bj0)
One upright pouch and snack bin with a low front is the fix for drink pouches, yogurt tubes and snack bars, which are small, slippery and born to migrate to the back of the deepest shelf. Left loose, they slide down the gaps beside bigger items, settle out of sight and expire quietly, to be found months later during a big clean.
The bin corrals the whole crowd in one place. Kids can see the choices at their eye level, and you can see the level dropping before the lunch box panic starts. Restock from the back of the bin so the oldest pouches move to the front. One small bin per child also ends the daily argument about whose snacks are whose.
Condiment Pull Out Caddy

Image Credit: Pinkoi (https://en.pinkoi.com/product/XuueS6Sq)
- Group sauces by meal, breakfast spreads in one caddy, dinner sauces in another.
- Stand bottles upright with labels facing forward.
- Pull the whole caddy to the table at serving time.
- Rinse the caddy base monthly, since sauce rings collect fast.
A condiment pull out caddy gives sauces one portable home that pulls out for cooking and serving, then slides back as a single block, so condiments stop multiplying quietly at the back of door shelves and deep shelves alike. Nothing gets left behind the caddy, because the caddy is the back of its little world.
Common Questions
How do I stop food getting lost at the back of a deep fridge?
Store food in pull out bins, rolling trays or turntables so every item slides or spins to the front. Keep one food type per bin, label the front, and check the back row once a week before shopping.
What should I measure before buying fridge bins?
Measure the shelf width, depth and the clear height under the shelf above. Leave about an inch of space at the front so bins pull out without catching, and check your tallest bottles fit before ordering a full set.
Where should raw meat go in a deep fridge?
Keep raw meat in a lidded bin or tray on the lowest shelf, below ready to eat food, so drips cannot reach other items. Pull the whole bin out to choose a pack instead of reaching past other food.
How often should I sort out a deep fridge?
Do a quick five minute check weekly, moving older food to the front and wiping spills. Once a month, empty one shelf fully, wash its bins and trays, and throw out anything past its date before reloading.
Conclusion
A deep fridge stops wasting food the moment every item can be seen and reached without a dig. Start with one shelf, add a pull out bin or a rolling tray, and let these deep fridge organization solutions spread through the fridge at your own pace. Take a quick photo of your fullest shelf before you begin, because the before and after difference is the best motivation to keep going. If an idea here solves your worst shelf, save this list to your Pinterest board for your next reset day, try the idea this week, and share it with a friend whose fridge hides food too.